Steps by Step Guide to Complete ZRA Integration with eZee Optimus
Please Note that this is a paid integration hence this will work only for the subscribed accounts
Please follow the steps below carefully to set up the ZRA Integration.
Step 1: Download the Integration File
Download the integration file from the link below on the computer where the ZRA integration will be configured:
Download Integration FileStep 2: Extract and Place the File
Once the ZIP file is downloaded, extract it. Create a new folder at the following location and create a new folder as "eZee"
C:\Program Files (x86)\eZee
Paste the extracted integration folder inside this path.
Step 3: Run the Application
Open the folder you just pasted.
Locate the file named "eZeeFiscalServiceHost" (file type: Application).
Right-click on it and select "Run as Administrator."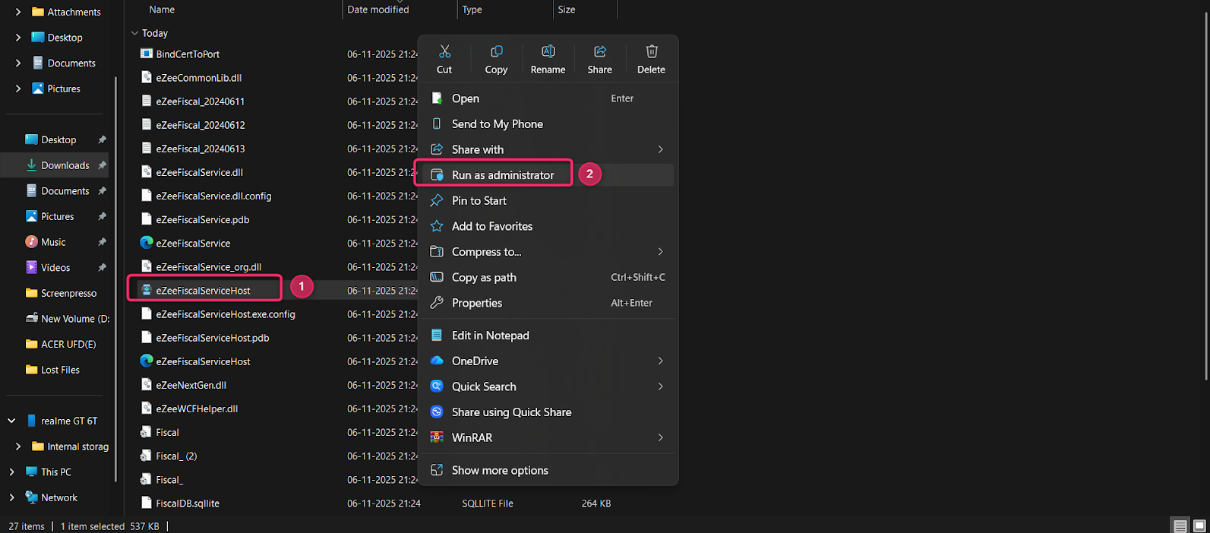
Step 4: Configure Integration Settings
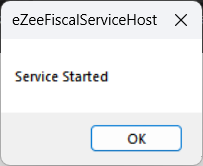
Once it is started you will see following dialogue Box or small window.
Once the application is open, click on "Stop".
Then click on Settings.
In the settings window:
- Select Integration Name: VFMS
Update the following details:
- URL:
https://gateway.zanrevenue.org/vfms/api/sales/ - Access Token: (To be shared by the ZRA Team)
- VFMS Request Type:
NORMAL_SALES - VFMS Integration ID: (Provided by the ZRA Team)
If the VFMS integration is only for the Restaurant, enable the Restaurant Only option.
Click Save once done.
Step 5: Update Receipt Template in eZee Optimus
- Log in to eZee Optimus & Switch to Back.

- Navigate to Settings → Printing Template → Receipt Templates.
- Open the desired template and click on the Settings icon.
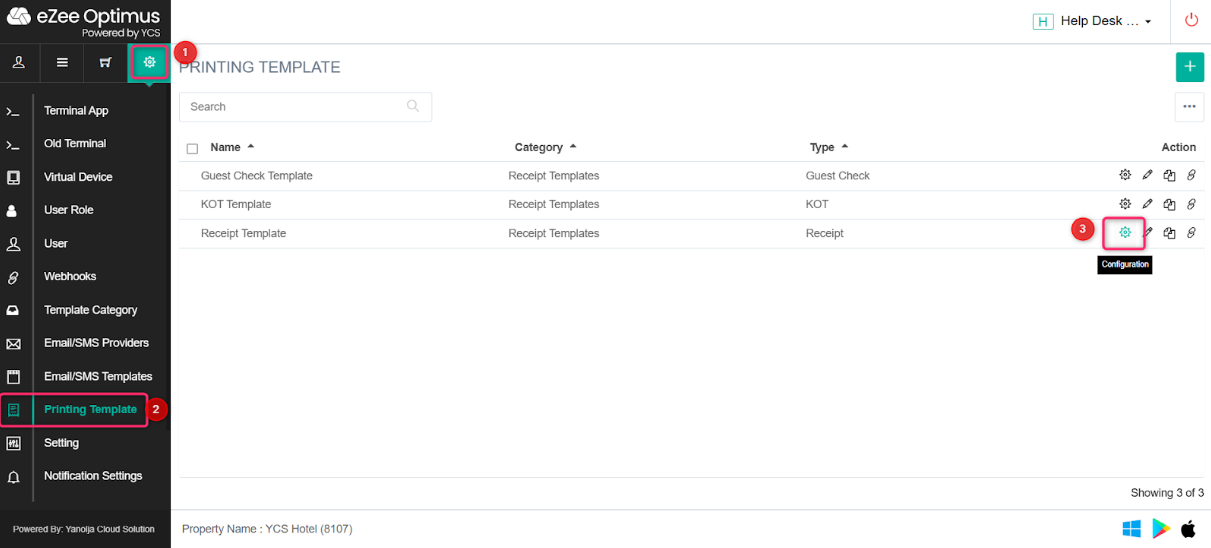

- Add the following tag in the template where you want the QR Code to appear:
{Fiscal_QRCode}
- Click Edit.
Step 6: Configure Peripheral Settings
Go to eZee Optimus Front by clicking Switch to Front. Click the grid icon in the top-left corner to open the main menu.
Scroll down to the Other section and select Peripheral Settings.
Go to Fiscal printer and add a printer & Update the following details:
- IP:
interface.ipms247.com - Port:
3041or3042 - Endpoint URL:
Fiscal_interface/process_print_V2
Step 7: Start the Integration Service
Go back to the eZeeFiscalServiceHost window.
Click on the Start button to begin the service. Click on the Magnifying Glass icon and enable the Start option to generate logs (useful for troubleshooting during testing).
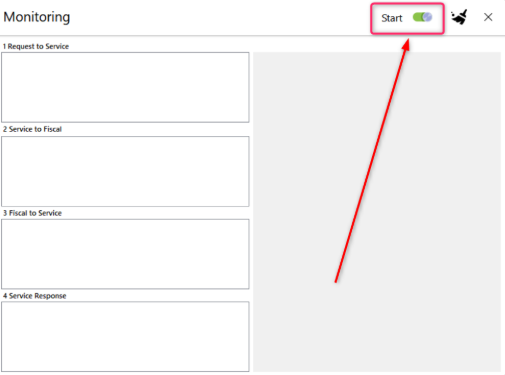
Step 8: Test the Integration
In eZee Optimus, take a test order and settle it.
Go to Order Summary, select the test order, and click Download PDF.
Check whether the QR Code is printed on the receipt:
- If the QR Code is printed — the integration is working correctly.
- If not, please reach out to us for further assistance.
Here is how you can understand how you can reach out to us.
Step 9: Automate Service Startup
Once the integration is completed, please follow the steps below to ensure the service starts automatically:
- Navigate to the following path:
C:\Program Files (x86)\eZee\eZee Fiscal Integration Files - Locate the file named "eZeeFiscalServiceHost" (File type: Application).
- Right-click on the file → Send to → Desktop (create shortcut).

- Once the shortcut is created, press Windows Key + R, type
shell:startup, and press Enter.
- Copy the shortcut file you created and paste it into the Startup folder.
By completing these steps, the service will automatically start every time the computer is turned on.
Important Note
If orders are taken from a tablet device, make sure the order is settled from the same computer where the ZRA integration is installed. Only then will the data be sent successfully to the ZRA portal.
Was this article helpful?
That’s Great!
Thank you for your feedback
Sorry! We couldn't be helpful
Thank you for your feedback
Feedback sent
We appreciate your effort and will try to fix the article