Details Required to Configure the CNAME:
Domain Name
The domain/subdomain you want to configure (e.g.,book.yourdomain.com).DNS Hosting Provider
Identify where your DNS is managed. It can be:Your Domain Registrar (e.g., GoDaddy, Namecheap), or
Your Web Hosting Provider (e.g., cPanel, Bedrock, HostGator).
Step 1: Configure CNAME Record
If DNS is managed via Domain Registrar:
Log in to your domain registrar account (e.g., GoDaddy, Namecheap).
Go to DNS Settings or the Manage DNS section.
If DNS is managed via Web Hosting:
Log in to your web hosting control panel (e.g., cPanel).
Look for DNS Zone Editor, DNS Records, or similar.
Add a CNAME Record:
In the DNS section, add a CNAME record as below:
| Field | Value |
|---|---|
| Type | CNAME |
| Name | book (you can use any subdomain like booking, reservations, etc.) |
| Value | live.ipms247.com |
| TTL | 30 minutes or 1800 seconds |
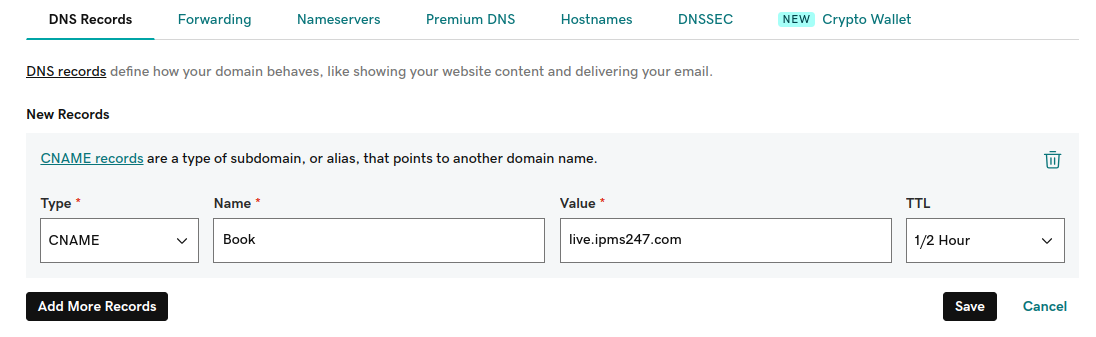
This will point your custom domain to our booking engine server.
Step 2: Set Up SSL Certificate (Create CAA Record)
To allow the issuance of SSL certificates, add the following CAA record in your domain's DNS settings:
| Field | Value |
|---|---|
| Type | CAA |
| Name | @ |
| Flag | 0 |
| Tag | issue |
| Value | godaddy.com |
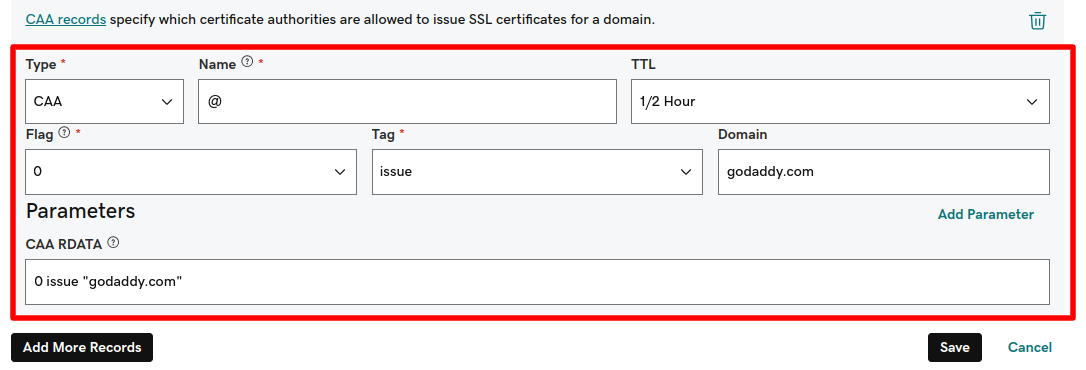
This ensures the SSL certificate can be issued successfully.
Once you add this Record then try to open the page(example: book.yourdomain.com) using the Cname link as added above. If you see it is Redirected to Sucuri Page it means the Cname record was added successfully.
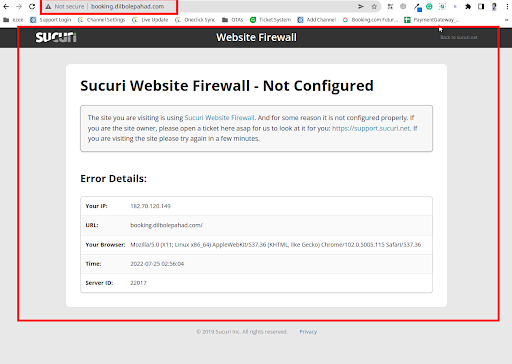
Once the domain is redirected to Sucuri, please share the configured CNAME record along with a screenshot of the Sucuri error by generating a ticket from the Help Yourself. This will help us generate the required whitelisted IP address, and we will get back to you with the final step once that's done.


Was this article helpful?
That’s Great!
Thank you for your feedback
Sorry! We couldn't be helpful
Thank you for your feedback
Feedback sent
We appreciate your effort and will try to fix the article