What is Physical Stock?
Physical Stock is used to record the actual stock that has been physically verified or counted in the store.
By adding Physical Stock, you can:
- Identify discrepancies between actual stock and POS (computer) stock
- Enter Opening Stock
- Update stock based on actual counted quantities
Why should I perform Physical Stock?
You should perform Physical Stock to:
- Ensure inventory accuracy
- Detect stock shortages or excess
- Reconcile system stock with actual stock
- Update inventory records correctly in POS
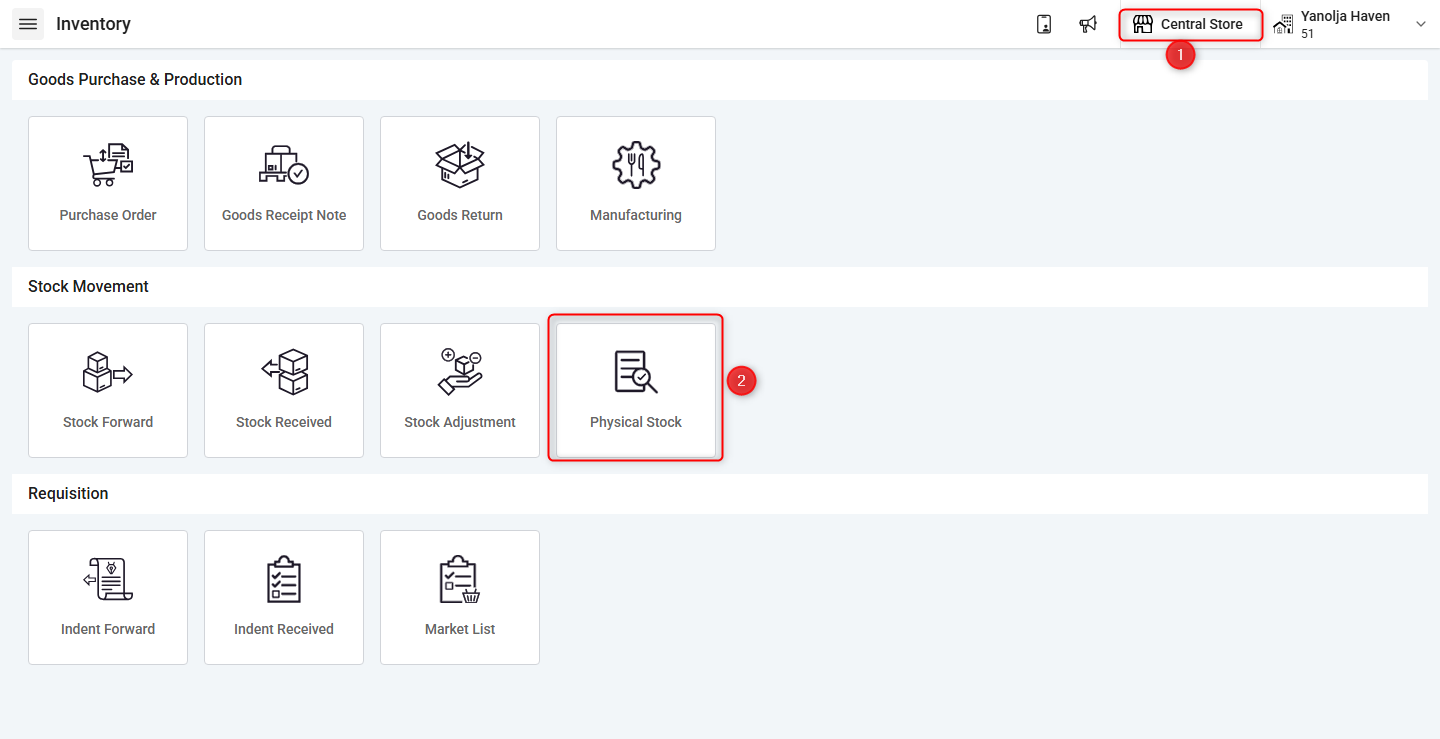
Step 1:
1. Select the Store for which you want to perform Physical Stock.
2. Click on Physical Stock.
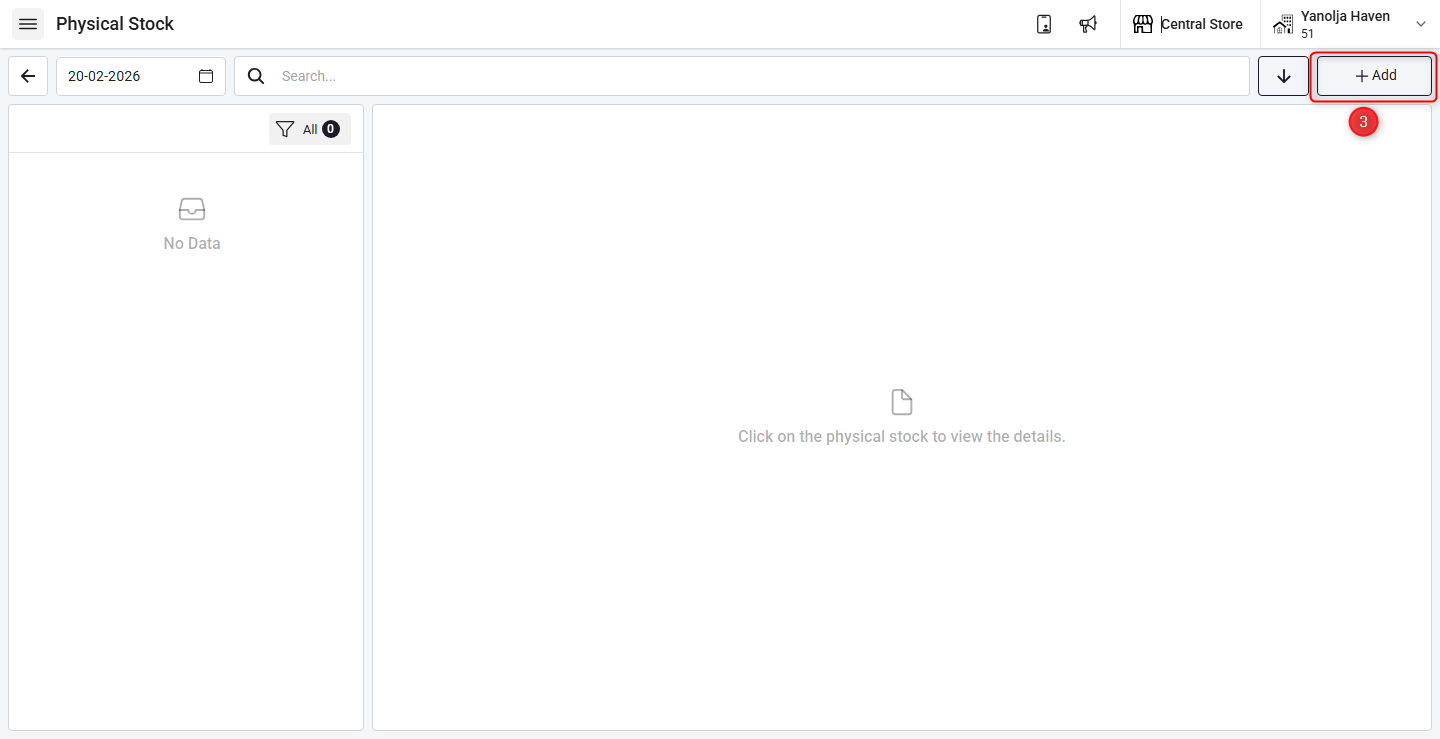
Step 2:
3. Click on “+ Add”.
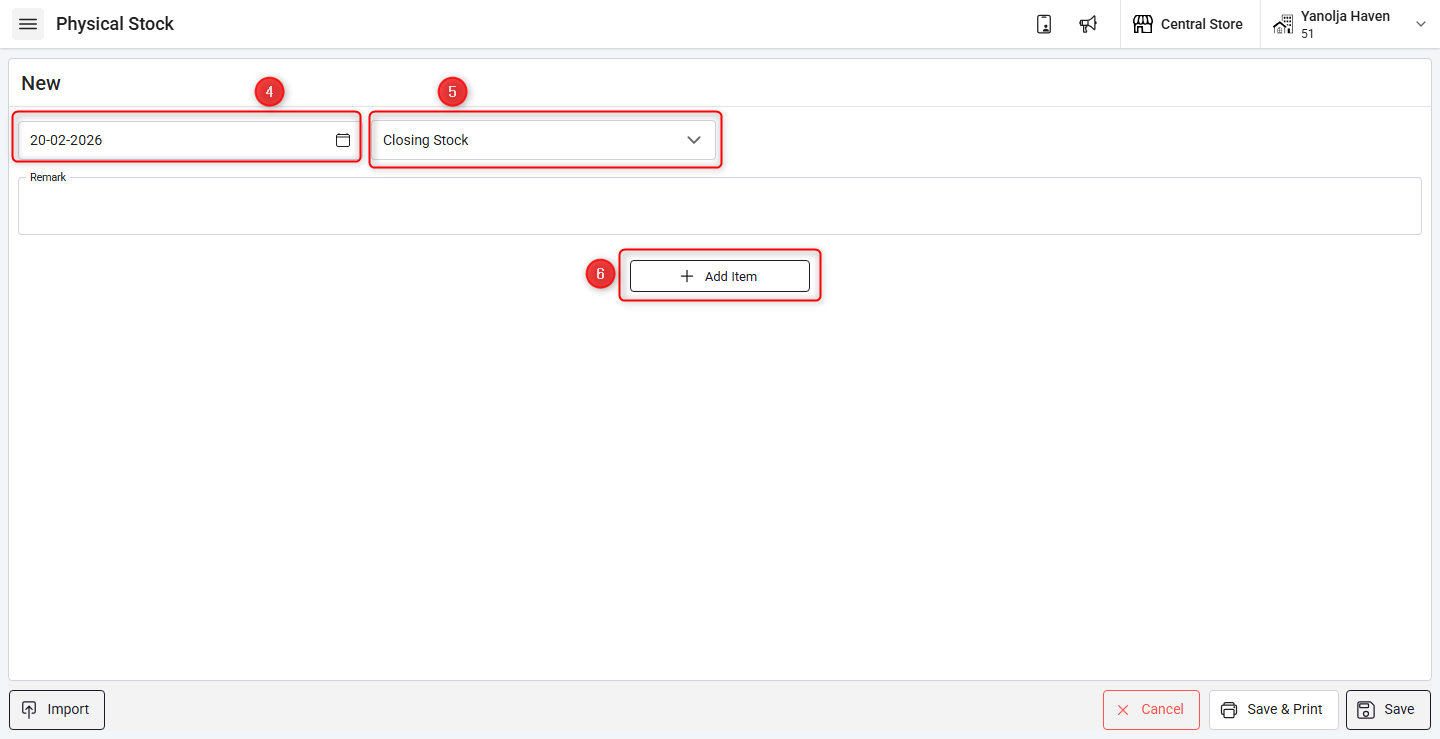
Step 3:
4. Select the date for which you want to perform Physical Stock.
5. Choose one of the following options:
- Opening Stock
Refers to the quantity and value of items available at the start of business or transaction period.
- Closing Stock
Refers to the quantity of unsold items remaining at the end of a specific day.
6. Click on “Add Item” to select inventory items.
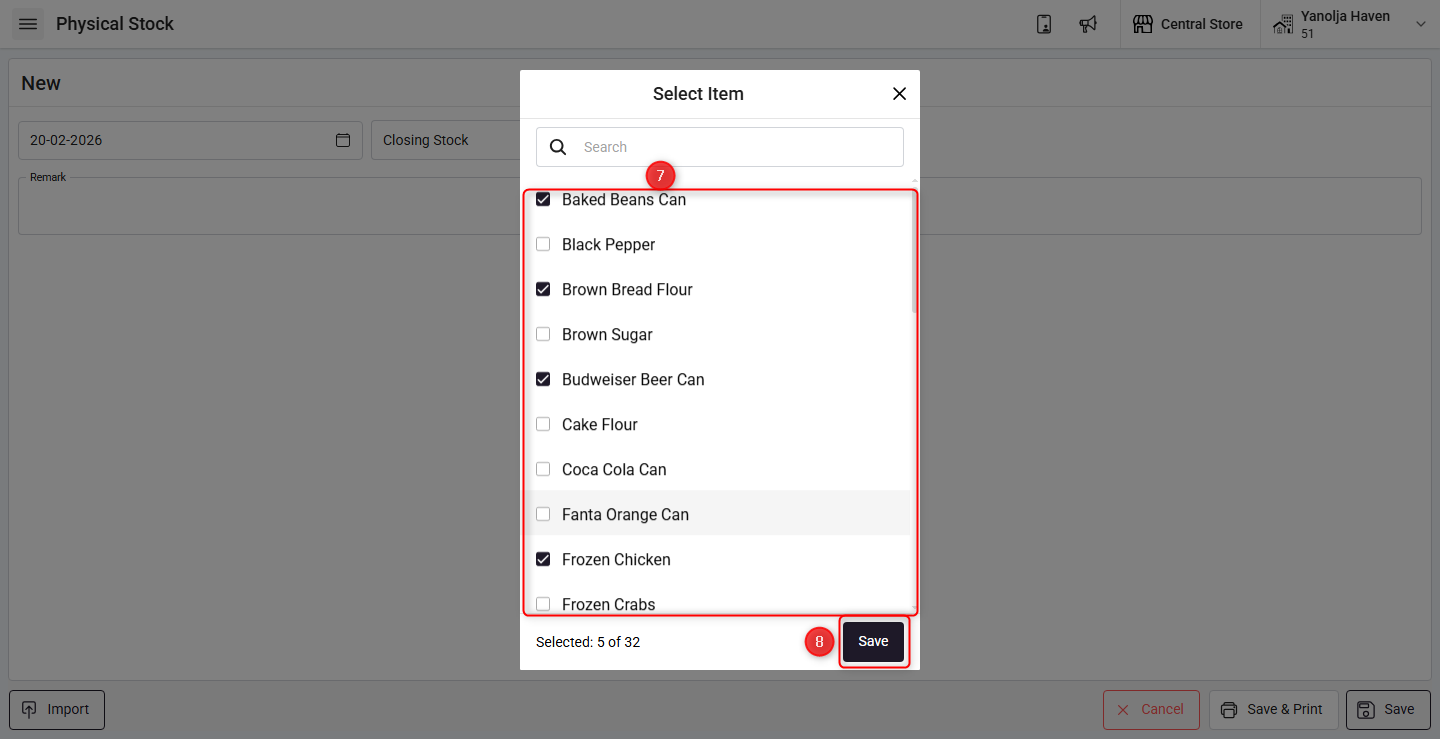
Step 4:
7. Select the items you want to perform Physical Stock for.
8. Click Save after selecting all required items.
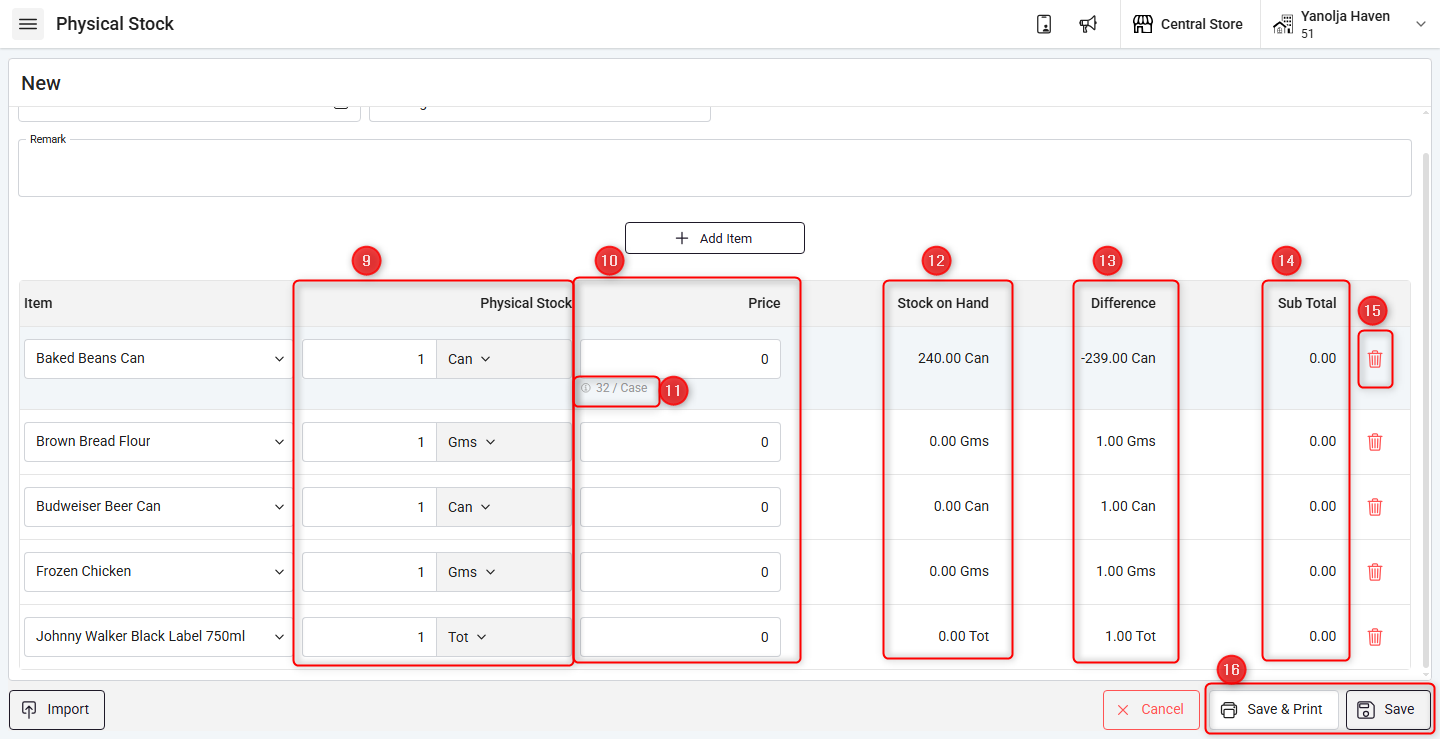
Step 5:
9. Enter the counted physical quantity with the correct unit.
10. Enter the cost price per selected unit.
11. You can click to view the last purchase price of the item.
12. The system will show the Stock in Hand (as per POS).
13. The system will display the difference between POS Stock and Physical Stock.
14. It will show the subtotal of the difference value.
15. Click the remove option if any item was selected incorrectly.
16. After verifying all details:
- Click Save → to save without printing.
- Click Save & Print → to save and print the Physical Stock Voucher.
Step 6:
17. Click on Import.
18. Click on Get File Format to download the Physical Stock sheet format.
19. Enter the exact inventory item name as created in POS.
20. Enter the counted Physical Stock quantity.
21. Enter the exact unit name assigned in POS.
22. Enter the cost price as per the selected unit.
23. Save the completed sheet and click Upload File in POS.
24. After uploading, click Next.
⚠️ Important: Item name and unit must match exactly as created in POS.

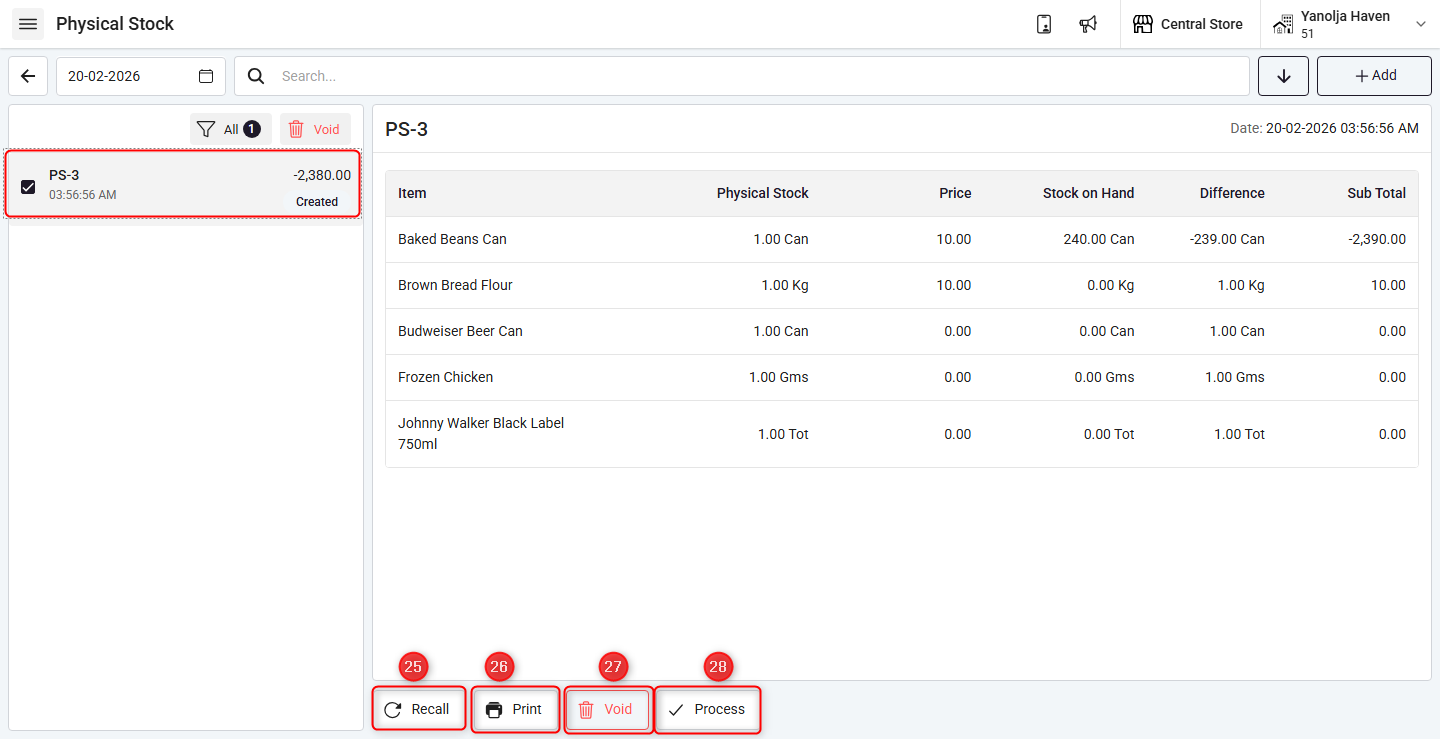
Step 7:
Once Physical Stock is created, you can:
25. Recall – Edit or make changes.
26. Print – Print the Physical Stock Voucher.
27. Void – Cancel the Physical Stock entry.
28.Process & Complete – Finalize the Physical Stock so inventory updates in POS.
Was this article helpful?
That’s Great!
Thank you for your feedback
Sorry! We couldn't be helpful
Thank you for your feedback
Feedback sent
We appreciate your effort and will try to fix the article