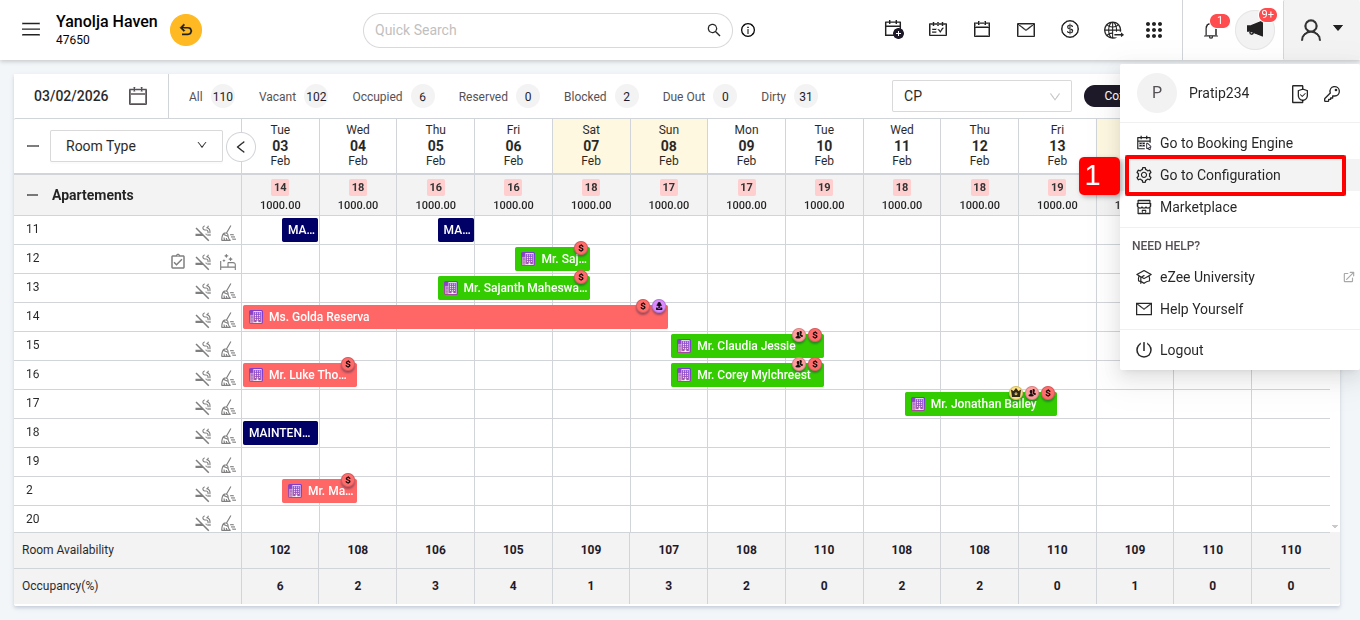
Step 1: Activate the Guest Portal
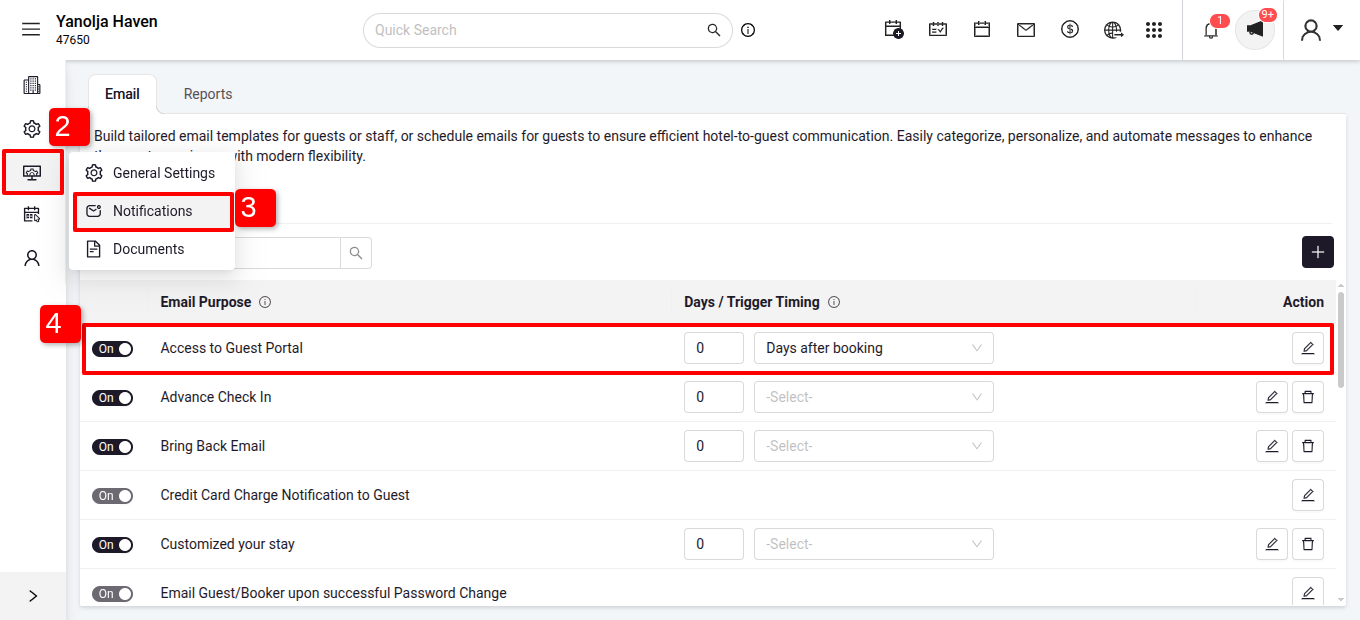
Path to Activation:
- Go to Configuration.
- Navigate to Settings > Notifications.
- Activate the Guest Portal.
- Configure the Days /Triggering Timing.
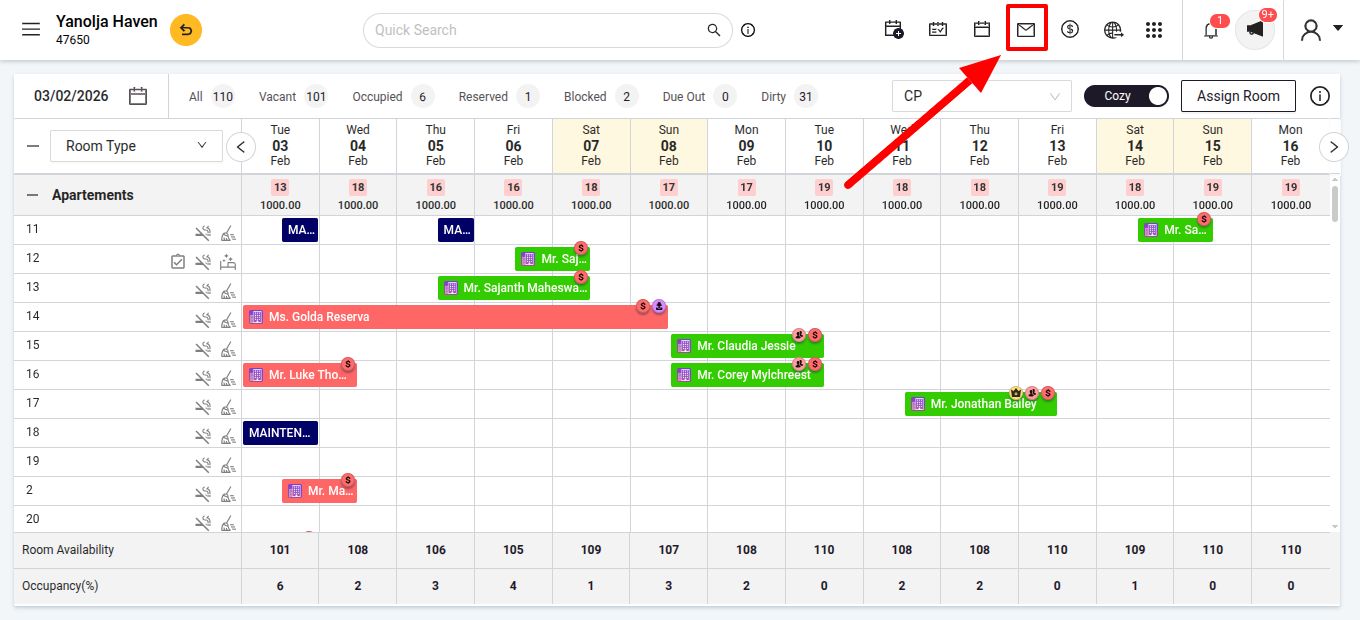
Step 2: Guest Access to the Portal
- When a reservation is made, an email is automatically sent to the guest containing the Guest Portal link.
- The guest clicks on the link, and the Guest Portal opens on their smart device.
Step 3: Features of the Guest Portal
The Guest Portal offers the following options:
✅ Confirm Check-In – Guests can complete check-in online.
✅ Need Transport – Request a transportation service.
✅ Manage Profile – Update personal information.
✅ Modify Booking – Change reservation details.
✅ Cancel Booking – Cancel the reservation if needed.
✅ Check Your Bill – View and download invoices.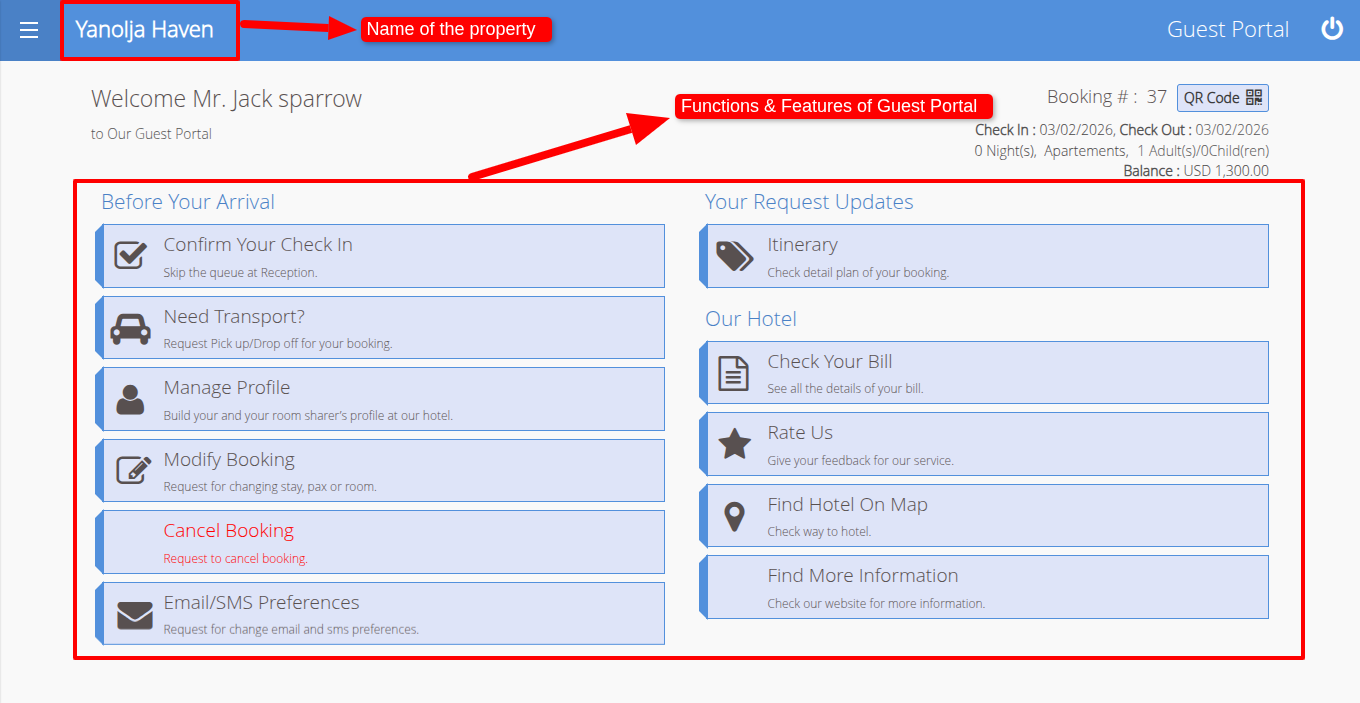
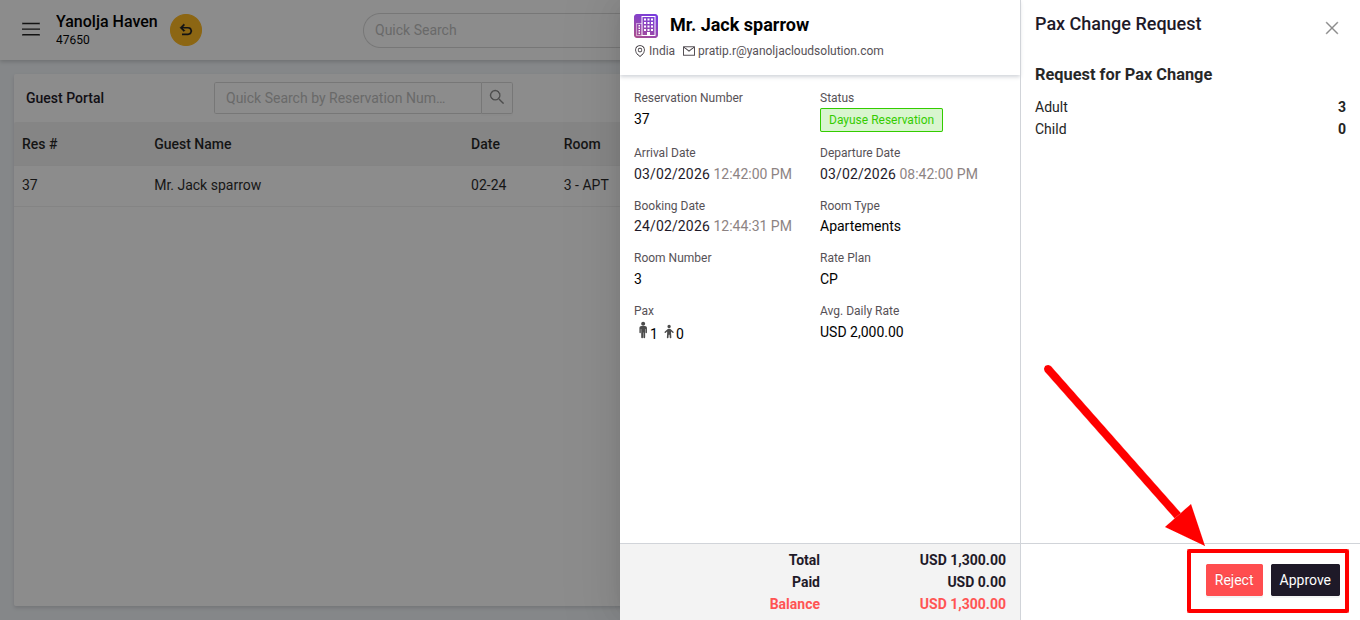
Step 4: Hotelier's View of Guest Requests
- Once a guest submits a request, the Front Office Manager/Executive receives a notification in PMS.
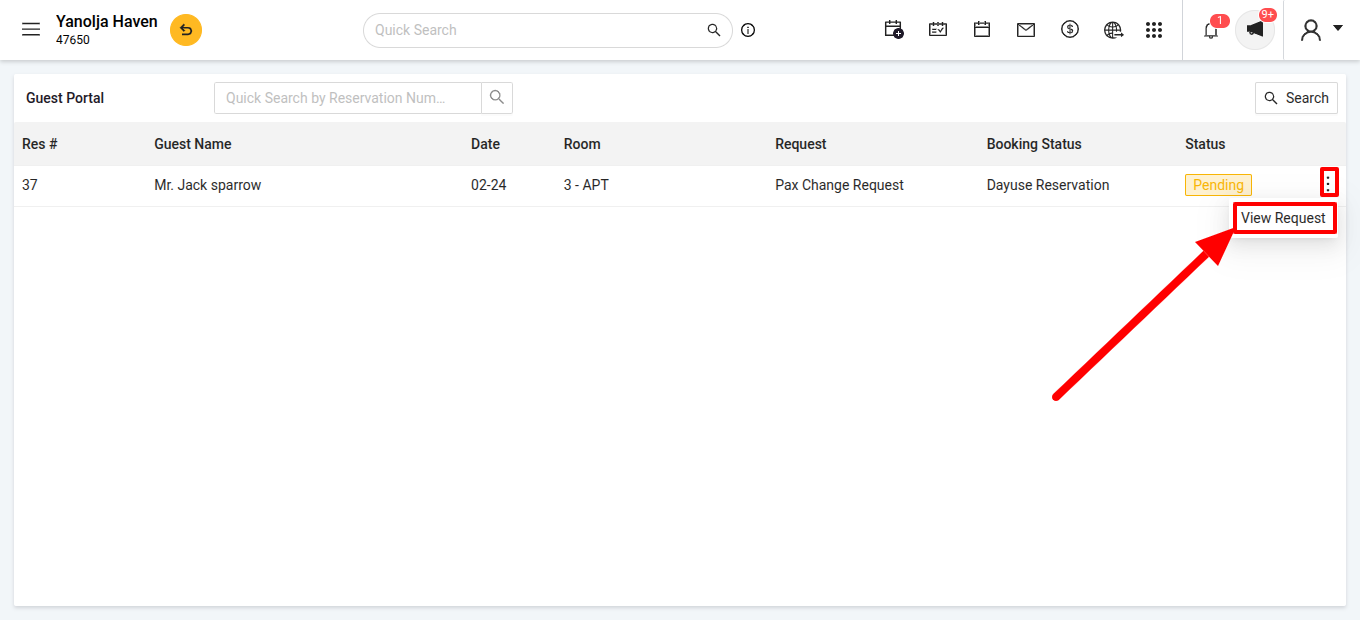
- The hotel staff can then Approve or Reject the request.
Conclusion
The Guest Portal streamlines guest interactions, enhances the check-in process, and reduces the workload on front desk staff. Make sure the portal is activated and configured correctly to provide a seamless guest experience.
- Once a guest submits a request, the Front Office Manager/Executive receives a notification in PMS.
Was this article helpful?
That’s Great!
Thank you for your feedback
Sorry! We couldn't be helpful
Thank you for your feedback
Feedback sent
We appreciate your effort and will try to fix the article