A passkey lets you sign in with your device's fingerprint, face, or PIN no one-time code needed.
Each passkey is tied to a specific device (for example, the front-desk computer). Once you've added one, a Sign in with passkey button appears on the sign-in screen.
Setting up a passkey
Go to Account Settings → Security & MFA → Passkeys and select Manage passkeys, then:
1. Select Add a passkey. (See Figure 9.)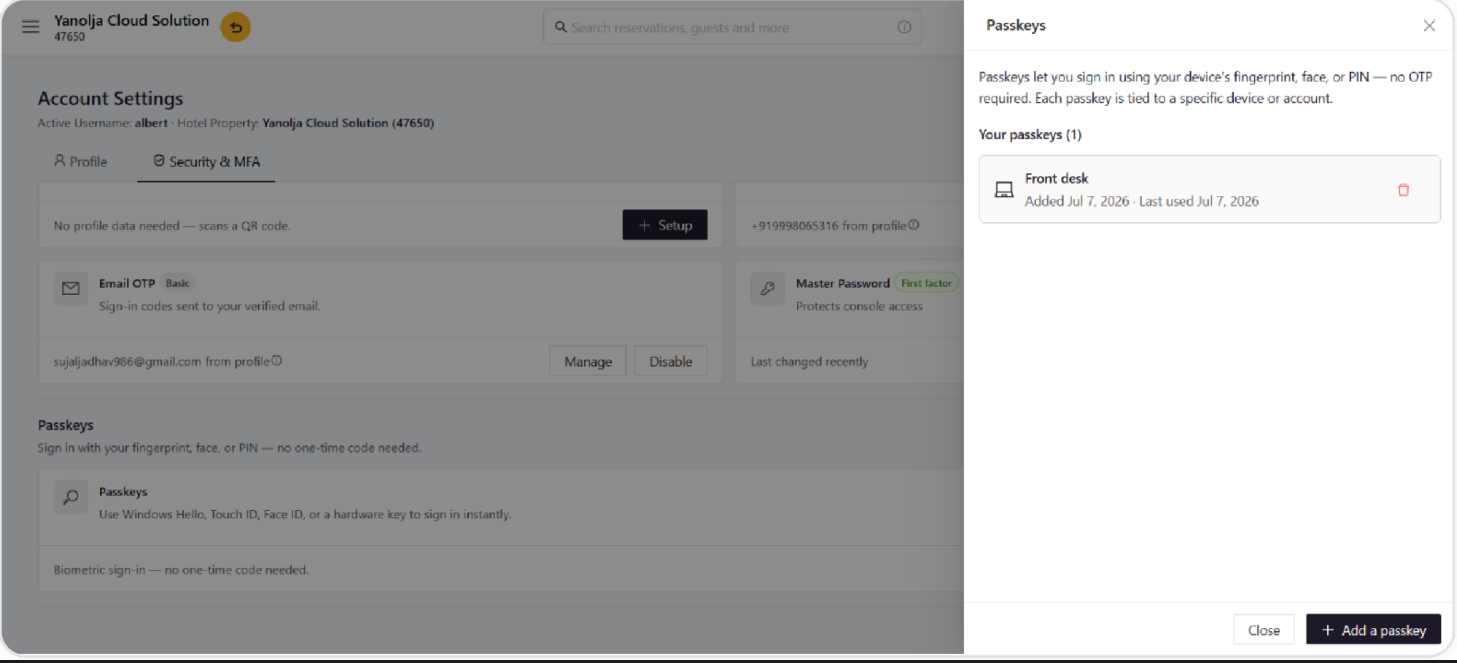
2. Give the passkey a name so you can recognise the device later - for example "Reception" or "Front desk". (See Figure 10.)
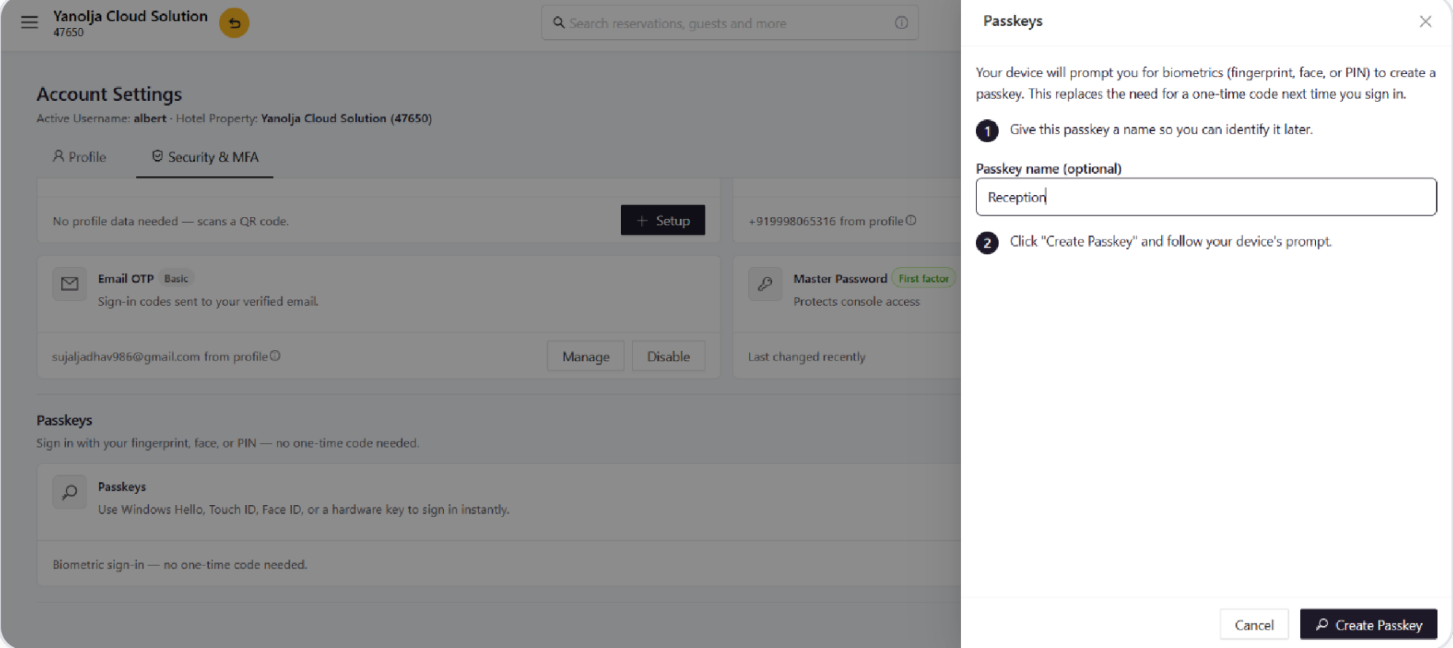
3. Select Create Passkey and follow your device's prompt (Windows Hello, Touch ID, Face ID, or a hardware key).
4. The passkey is saved and listed with the date it was added and last used.
Signing in with a passkey
1. On the sign-in screen, select Sign in with passkey.
2. Confirm with your fingerprint, face, or PIN. You're signed in instantly no OTP required.
TIP
Because a passkey lives on one device, add passkeys only to devices you control, and keep at least one OTP method active as a backup for signing in elsewhere. You can remove a passkey any time from the Passkeys panel.
Was this article helpful?
That’s Great!
Thank you for your feedback
Sorry! We couldn't be helpful
Thank you for your feedback
Feedback sent
We appreciate your effort and will try to fix the article