The eZee Agent Service requires .NET Framework 3.5 and the required Windows Communication Foundation components to be enabled on your system before installation.
Please follow the steps below to install the eZee Agent Service successfully.
Step 1: Open Windows Features
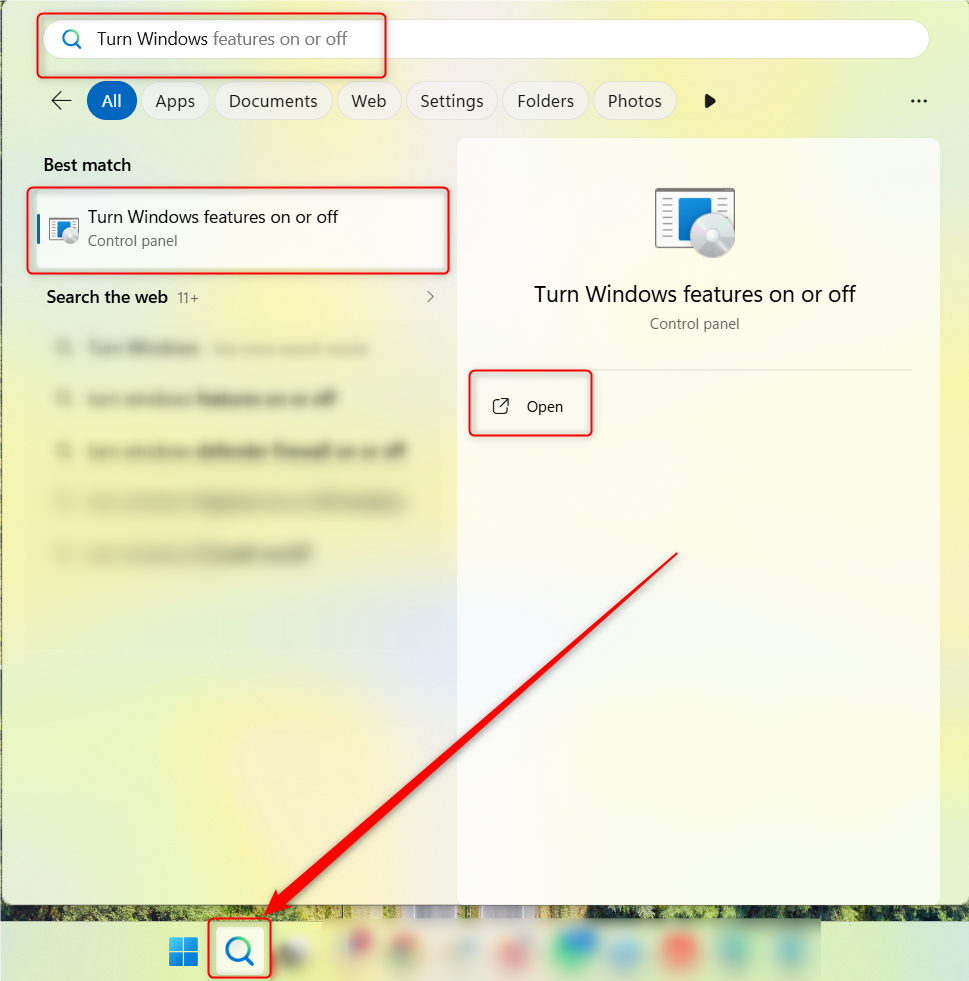
On your PC, open Turn Windows features on or off.
You can search for “Turn Windows features on or off” from the Windows Search bar and open it.
Step 2: Enable the Required Windows Features
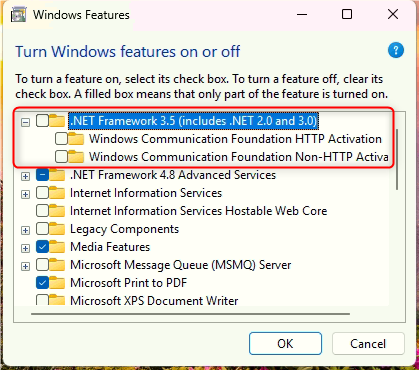
In the Windows Features window, enable/check the following options:
.NET Framework 3.5 (includes .NET 2.0 and 3.0)
Windows Communication Foundation HTTP Activation
Windows Communication Foundation Non-HTTP Activation
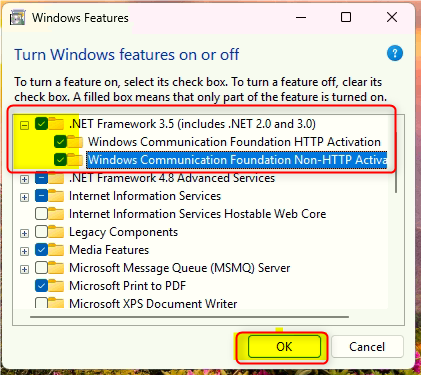
After selecting the above options, click OK.
Step 3: Download the Required Windows Files
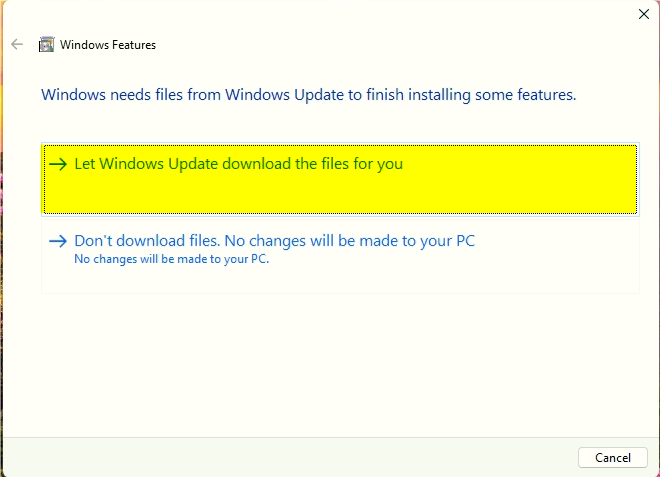
After clicking OK, a Windows Features pop-up may appear.
Select:
“Let Windows Update download the files for you”
Allow Windows to download and install the required files.
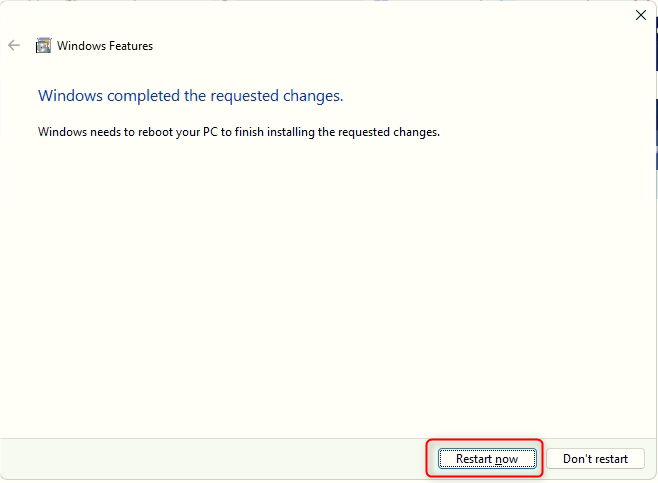
Step 4: Restart the PC if Required
Once the required Windows features have been downloaded and installed:
If Windows asks you to restart the PC, please restart the system.
If Windows does not ask you to restart, click OK and proceed to the next step.
Step 5: Download and Install the eZee Agent Service
Once the above Windows features have been successfully enabled, download the eZee Agent Service using the link provided below:
Download the installer and run the setup file.
Step 6: Installation Completed
Once the installation is completed successfully, the eZee Agent Service will be installed on your PC and will be ready for use.
Note: Please ensure that all the required Windows features mentioned above are enabled before installing the eZee Agent Service.
Was this article helpful?
That’s Great!
Thank you for your feedback
Sorry! We couldn't be helpful
Thank you for your feedback
Feedback sent
We appreciate your effort and will try to fix the article