This article explains the available methods to refund payments in the Property Management System (PMS) under Yanolja Cloud Solution as well as the user permissions required and reflection on reports:
- Processing a refund through an integrated payment gateway
- Recording a manual refund entry using cash or bank for record purposes
User Permission Required to Process Refunds
All charged or refunded transactions are reflected in the reports and can be reviewed daily for revenue tracking.
1. Refund When Payment Gateway is Integrated
If your property has an integrated payment gateway, refunds can be processed directly through the system.
Follow the steps below:
- Open the required reservation.
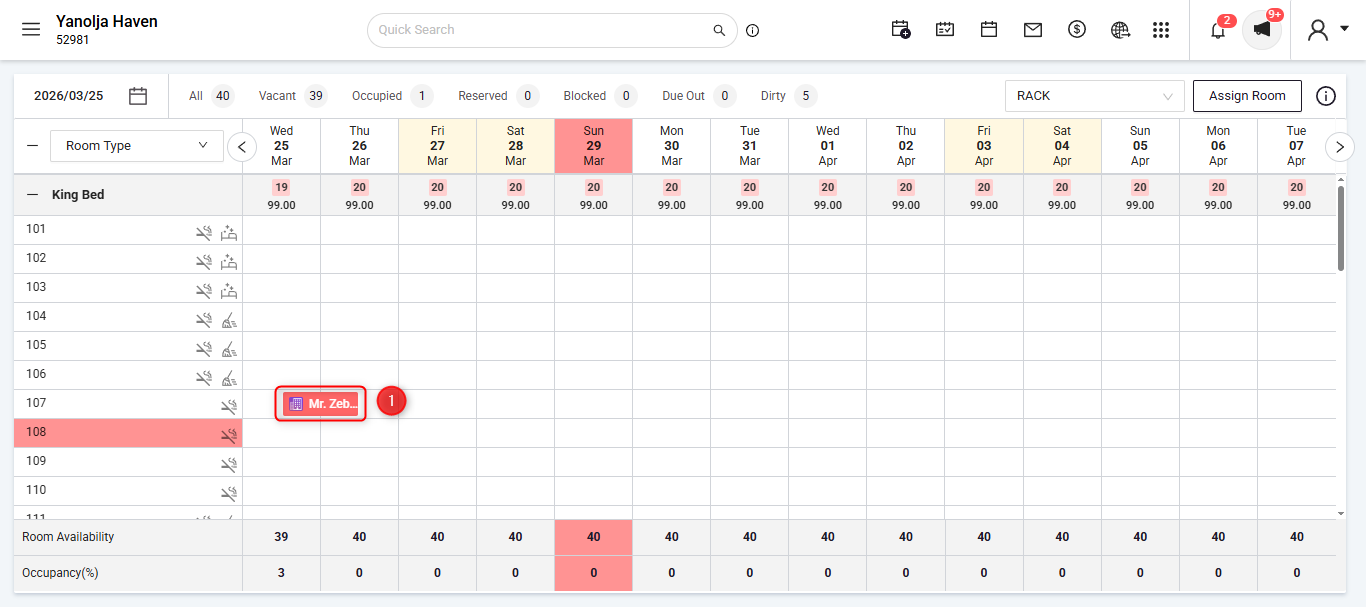
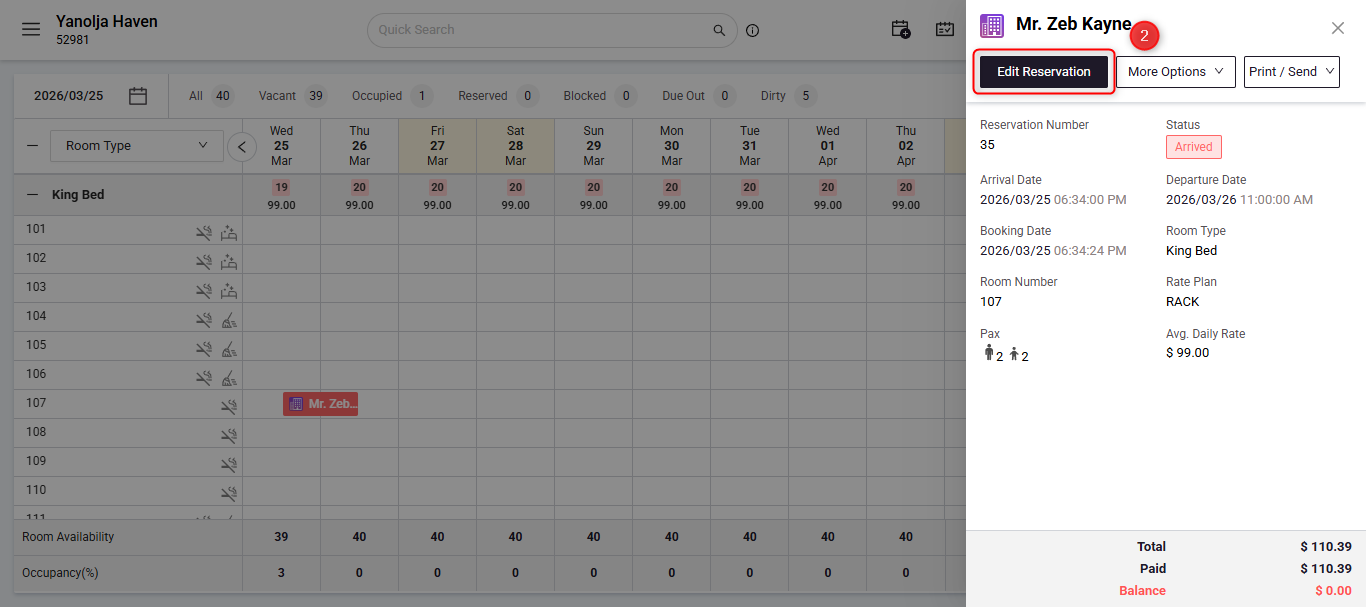
- Click on Edit Reservation and Navigate to the Folio Operations section.
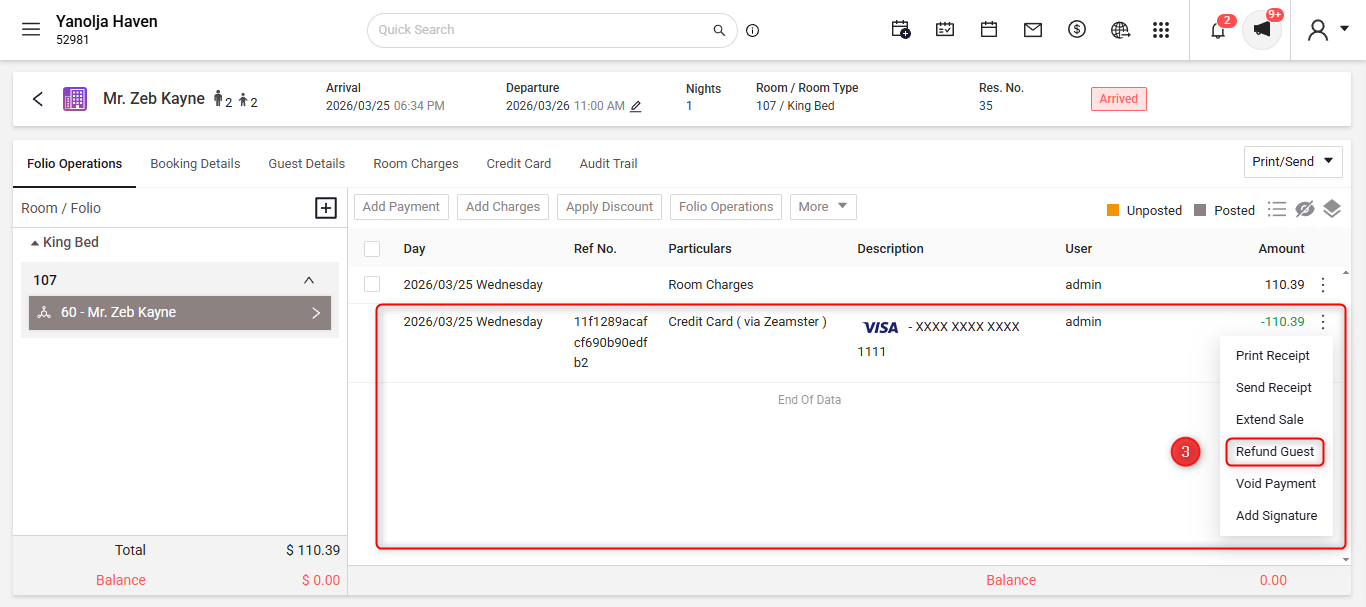
- Locate the payment transaction that was originally charged and click on the three dots (⋯) at the end of the transaction, then select Refund .
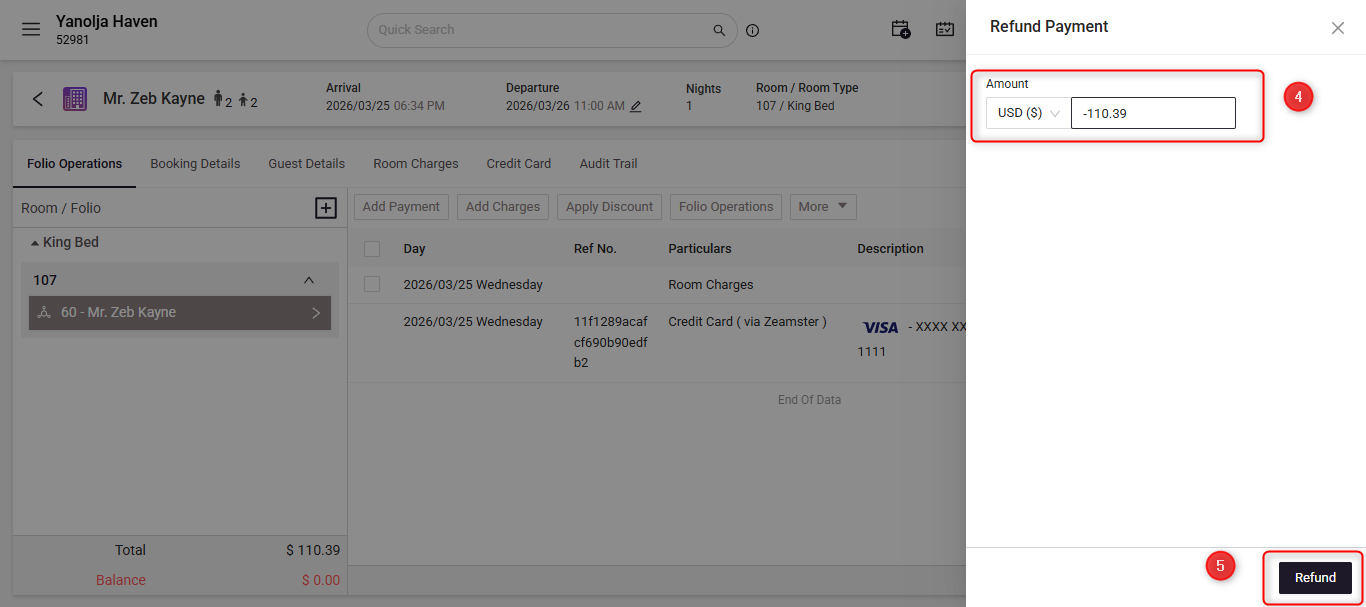
- Enter the refund amount.
- Click Refund to process the transaction.
- Once Refund is processed it will show you a separate entry with the details.
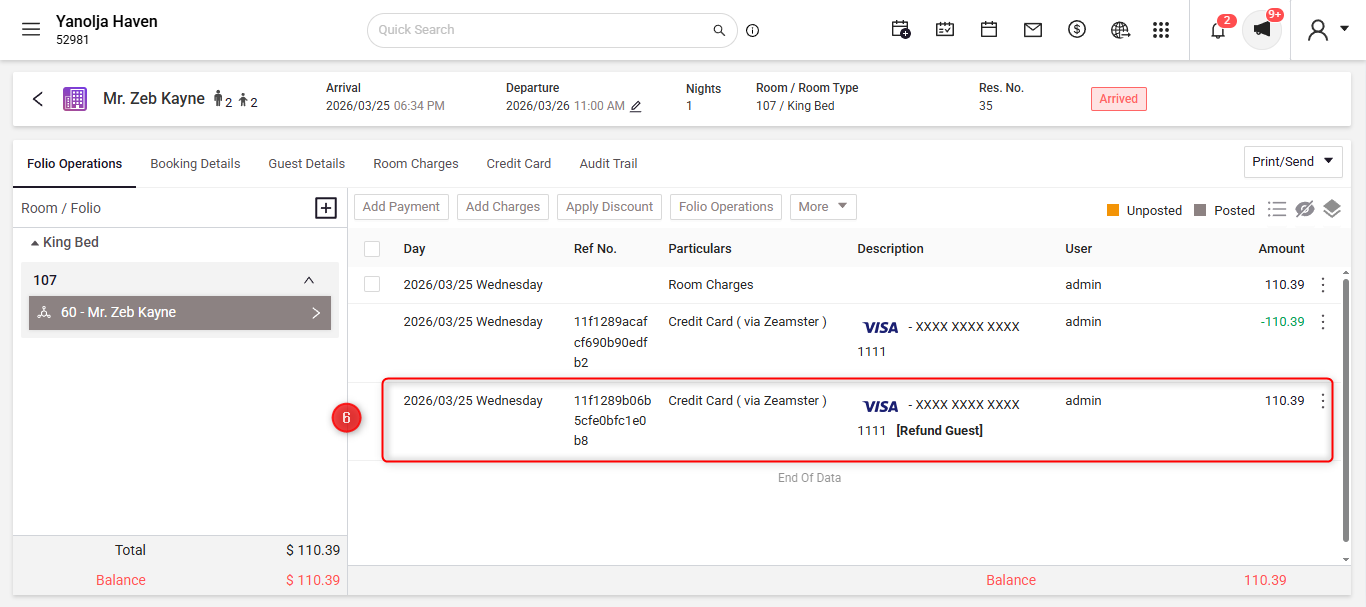
Important Notes:
- The refund amount cannot be greater than the amount originally charged.
- The refund amount can be equal to or lower than the charged amount.
2. Refund entry using cash or bank for record purposes
If a payment gateway is not integrated, refunds can still be recorded manually for transaction tracking.
Follow the steps below:
- Open the required reservation.
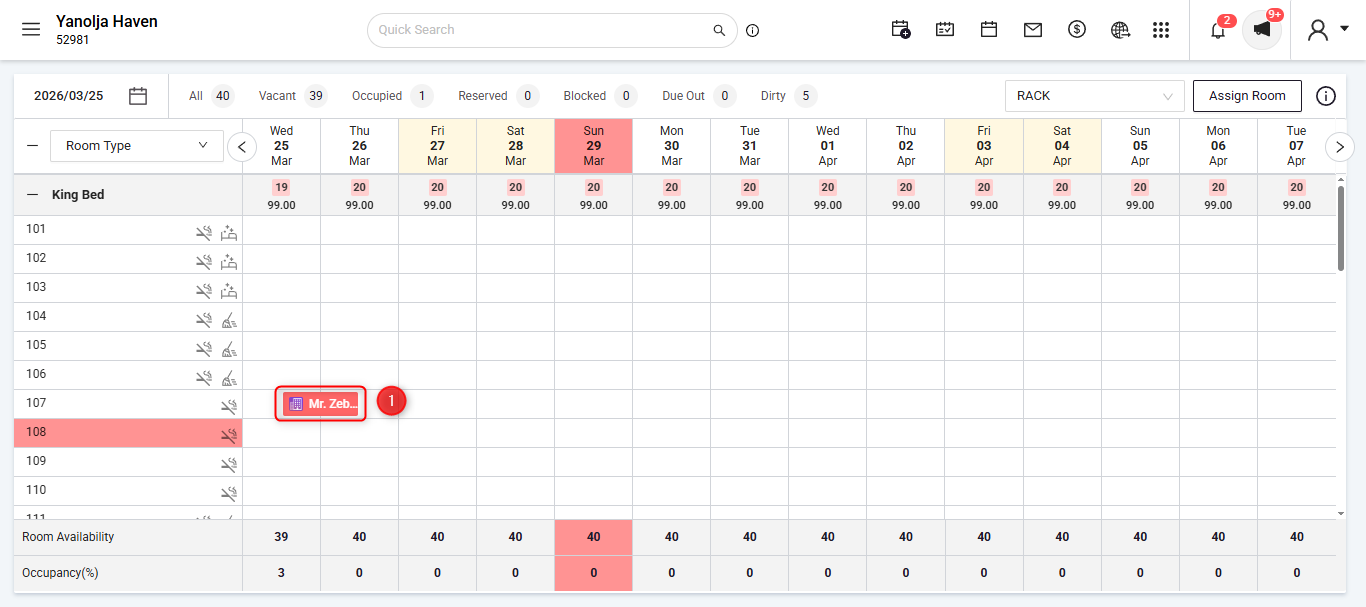
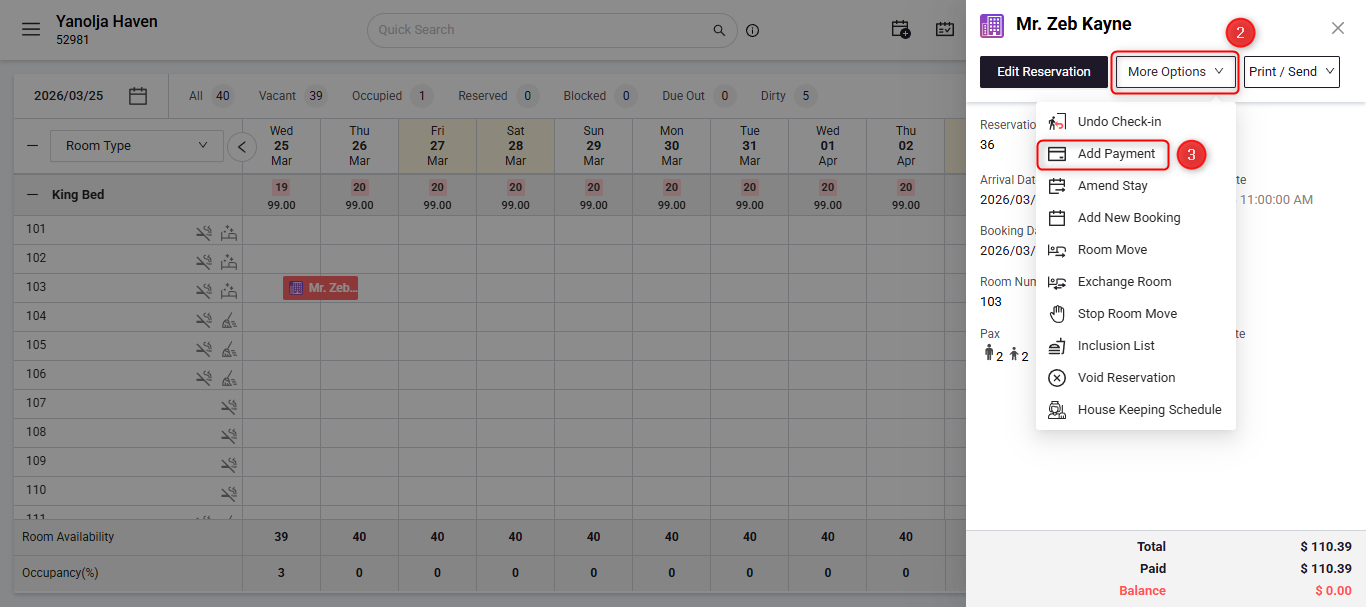
- Click on More options.
- Then select Add Payment.
- Select the mode of payment as other.
- Enter the refund amount.
- Choose the other payment mode:
- Cash
- Credit/Debit Card
- Check
- Click Save.
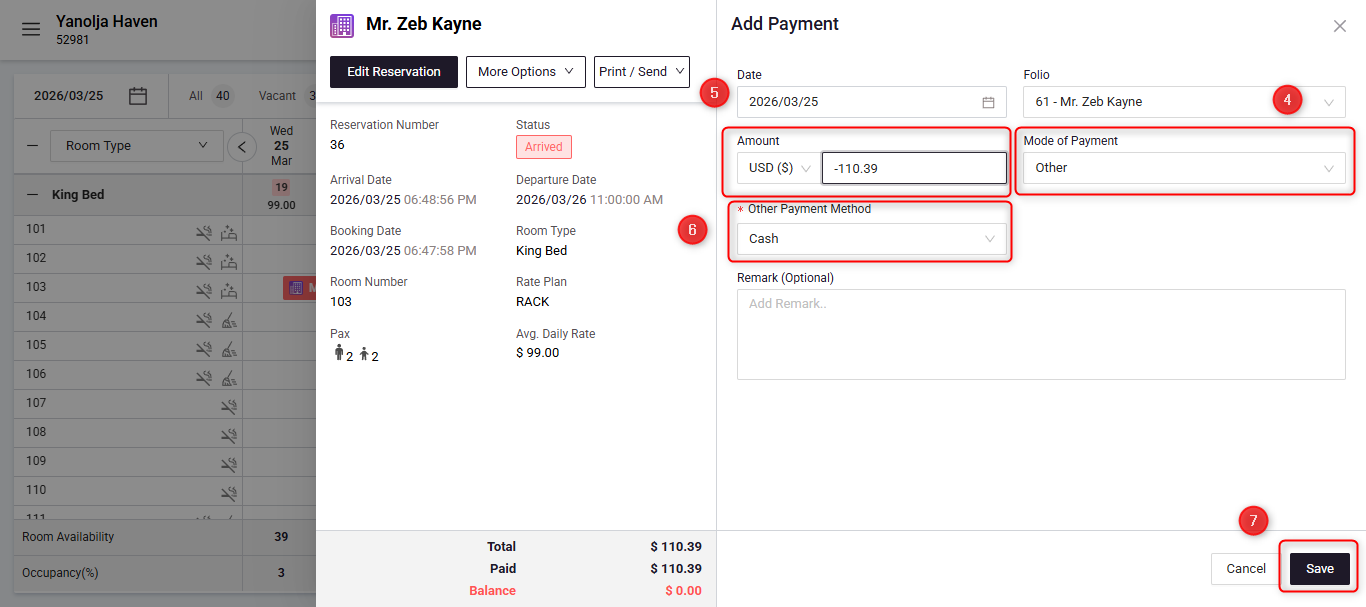
The system will record this as a refund transaction in the Folio Operations section.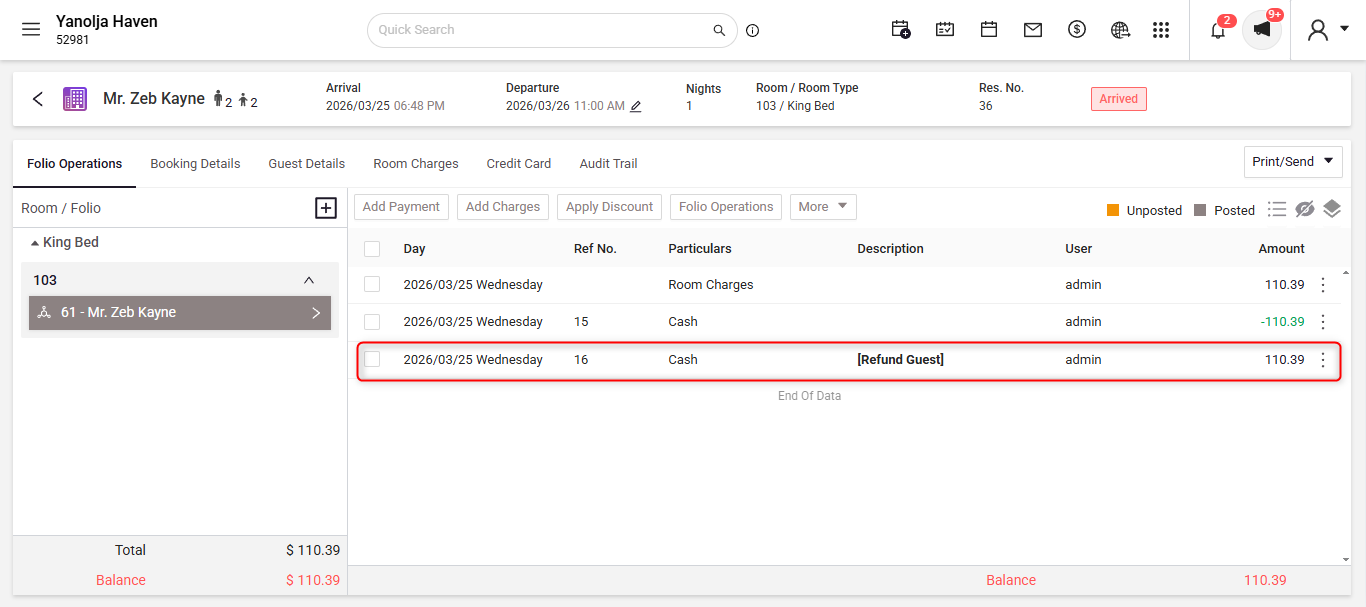
3. User Permission Required to Process Refunds
Users must have the correct permissions to process refunds.
To enable refund access for a user:
- Go to Configuration.
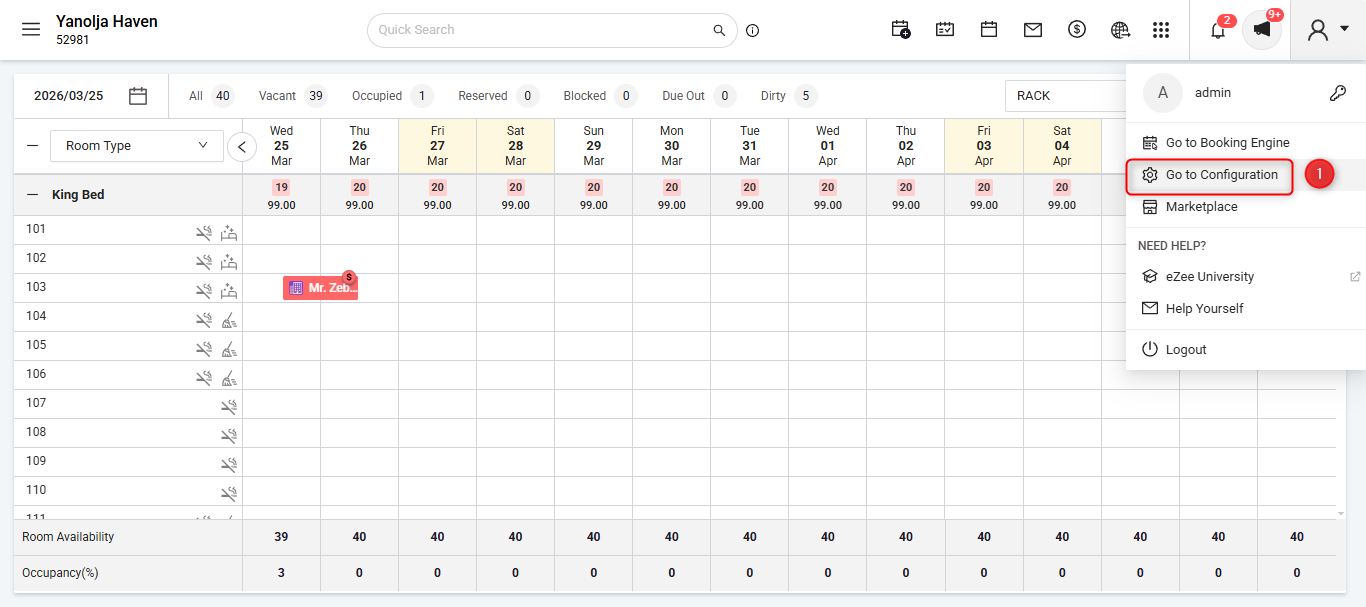
- Open User Management.
- Navigate to User Role.
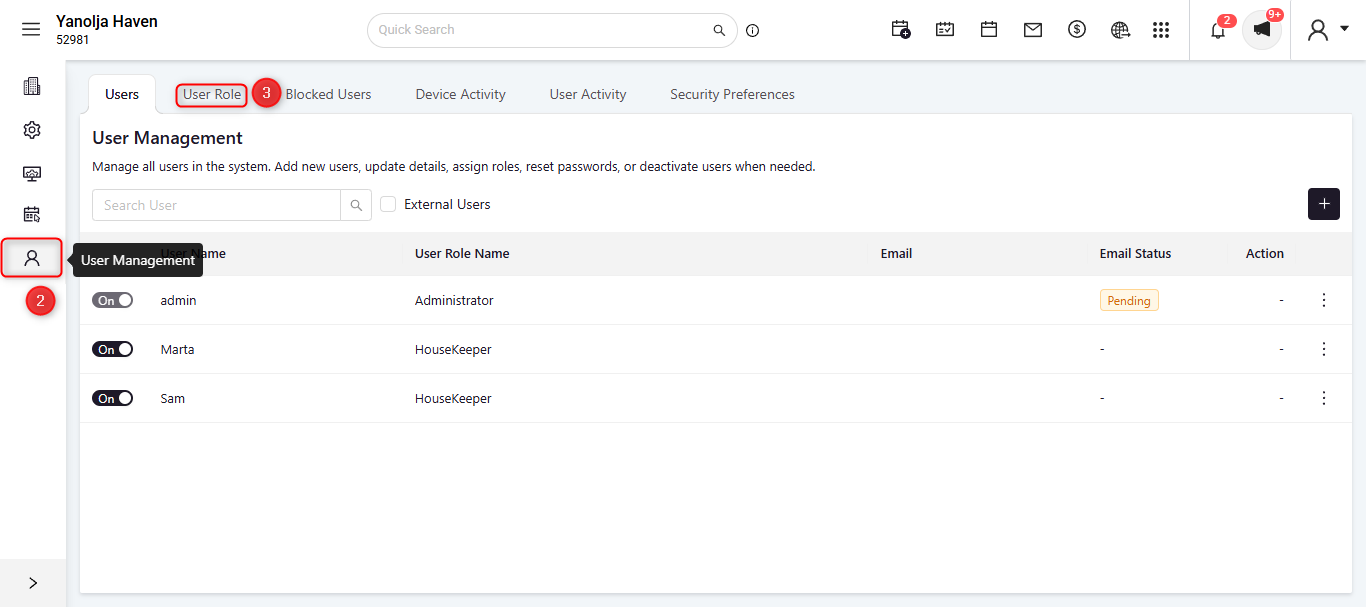
- Choose the user role that you want to give the access and click edit button.
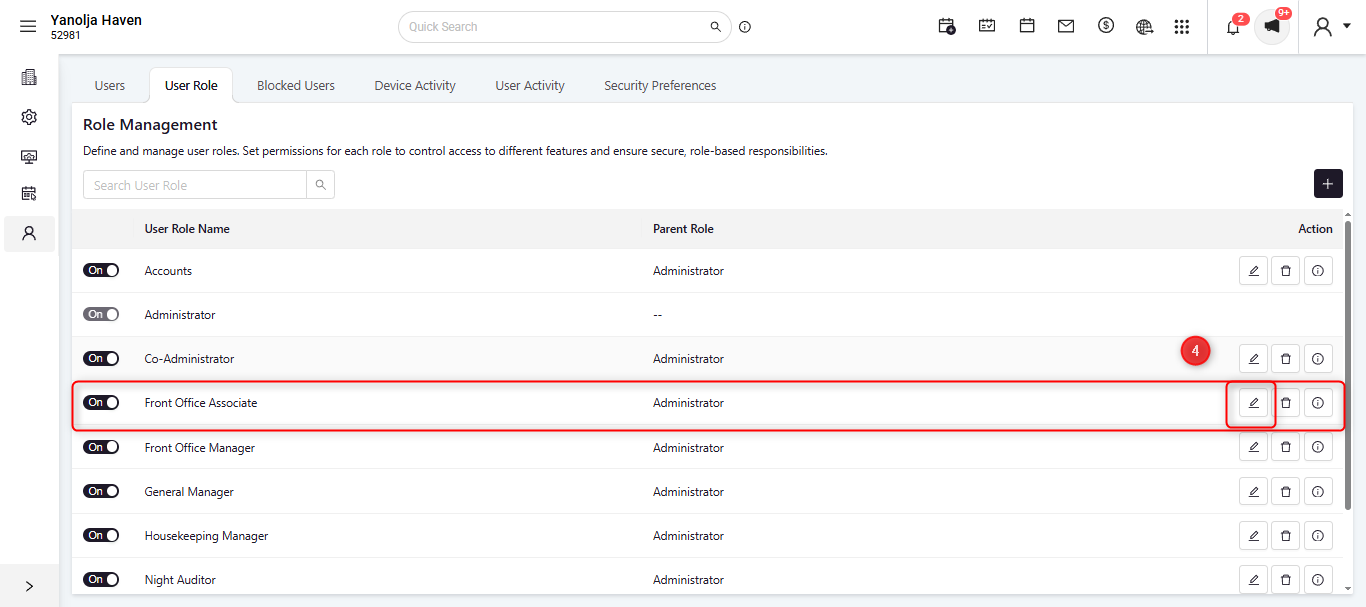
- Once the Window opens up for Edit user, click on the configuration tab.
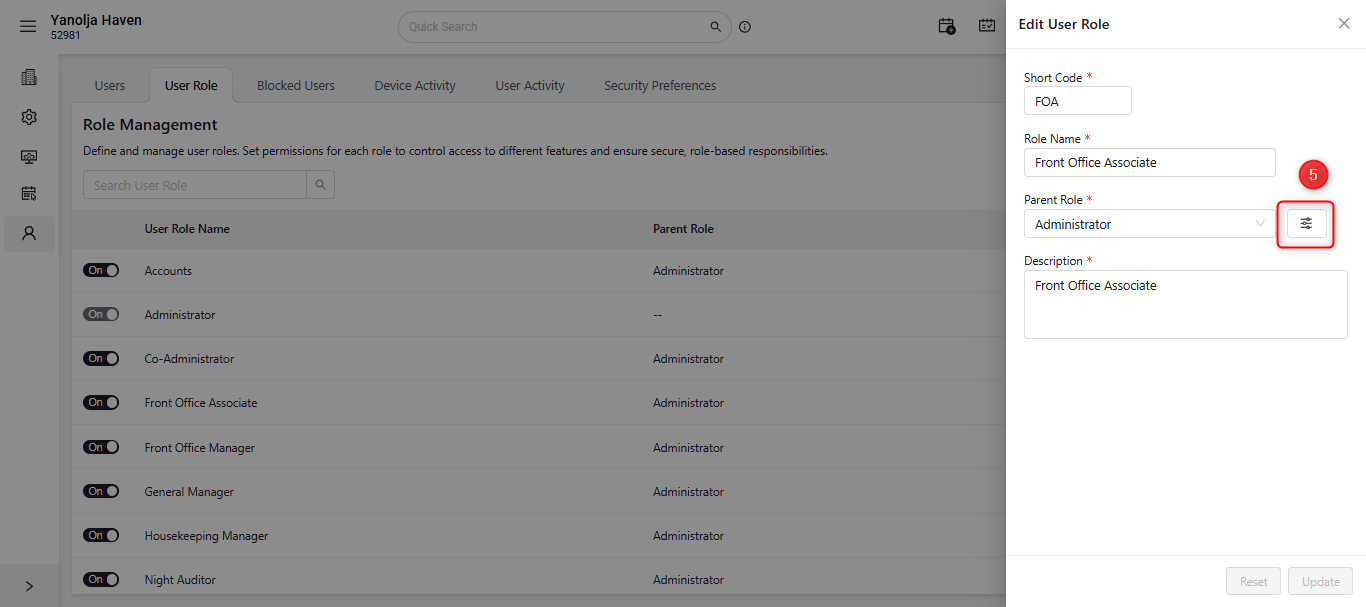
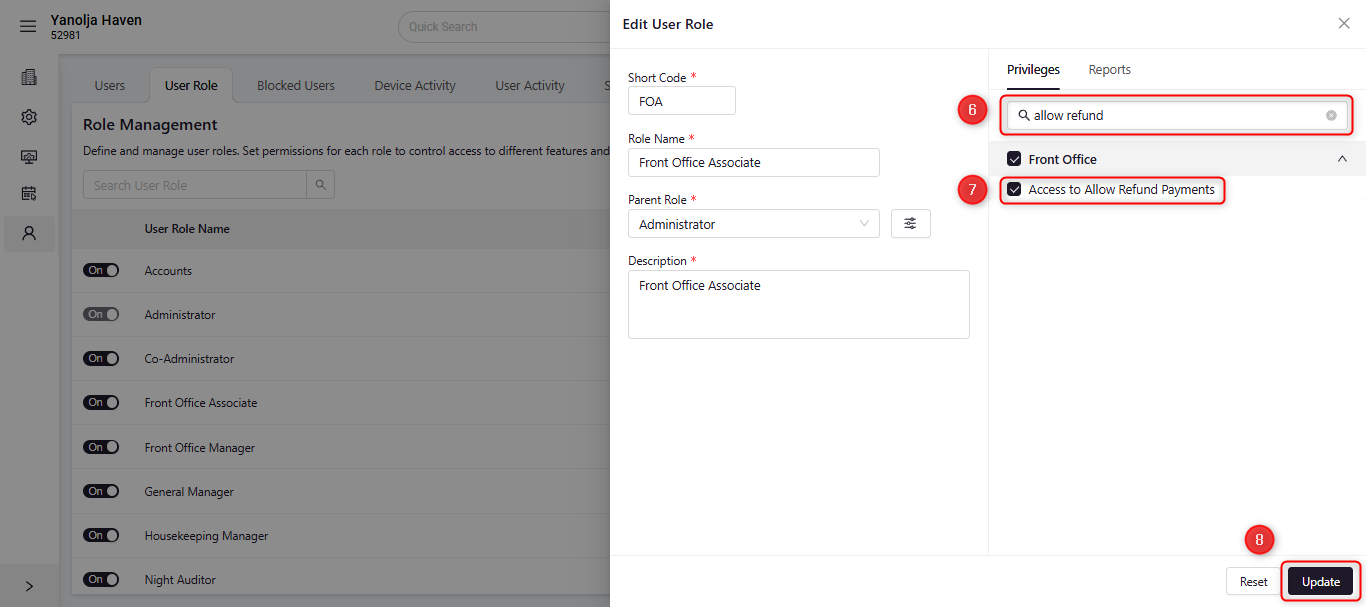
- Here you can search for all privilege's. Search for Allow refund
- Select the Access to allow refund payments box
- Lastly hit update and you the user will now be able to do refunds.
4. The system logs all charge and refund transactions in reports, which can be reviewed daily for revenue monitoring.
To check Click (☰) menu. Then navigate to reports section.
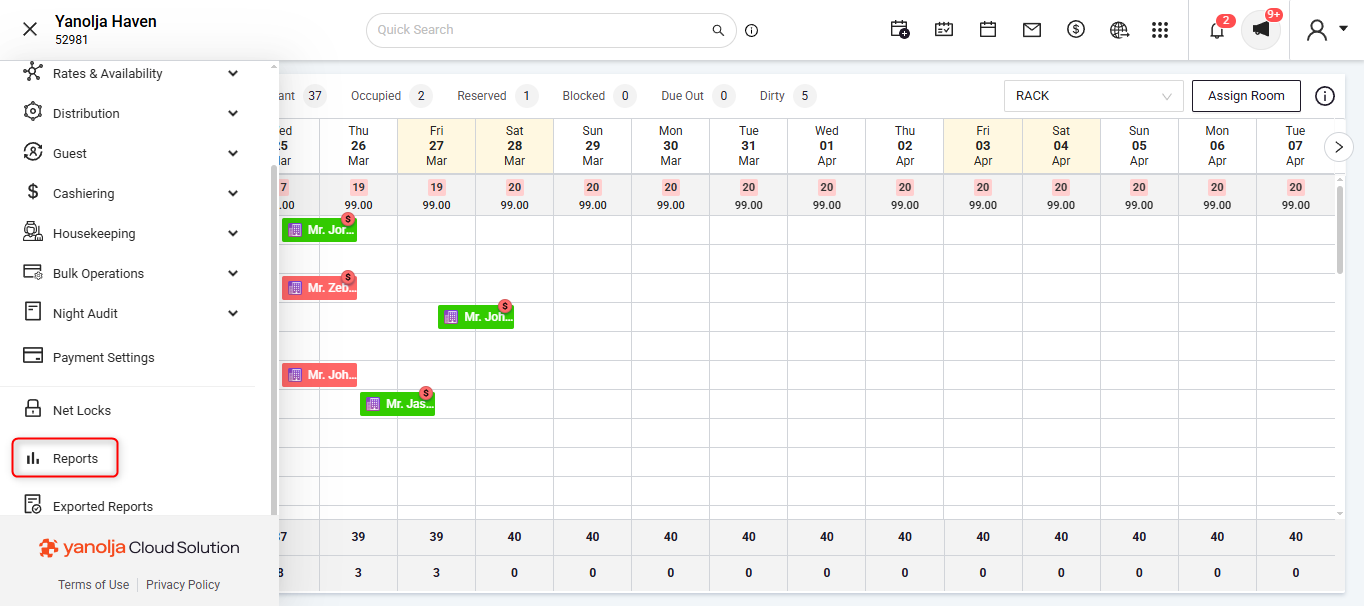
A new window will open displaying all available reports. Search for Daily Receipt – Detail.
Select the Daily Receipt – Detail report from the list.
In the Filters section, the current working date will auto-populate. You can adjust other filters as required.
Click Report to generate the report in PDF format, or select Export to Excel to download the data in Excel format.
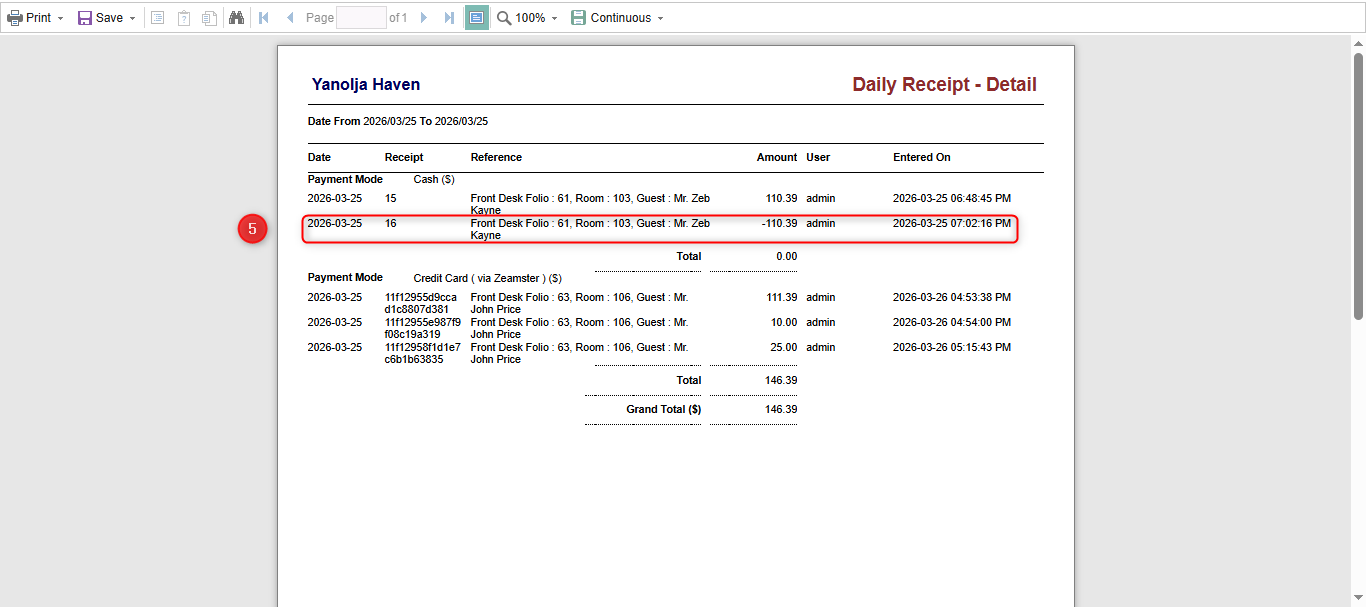
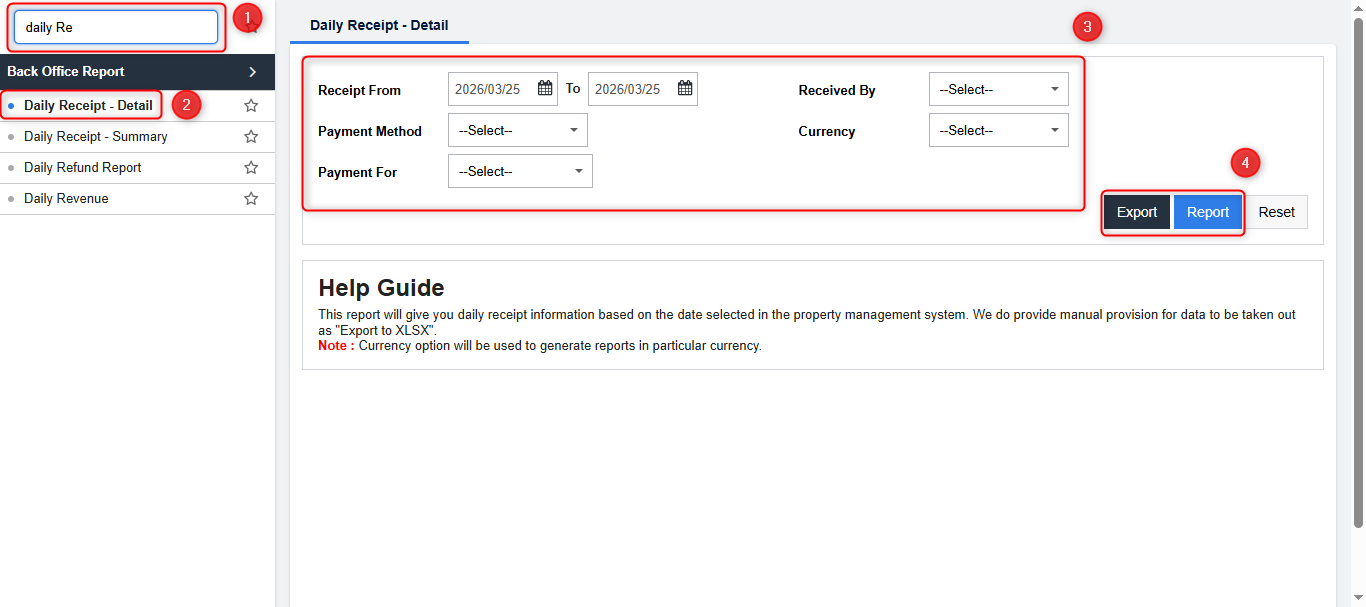 5. A new window will open displaying the report, where you can view the charges and refunds processed, categorized according to the payment mode.
Was this article helpful?
That’s Great!
Thank you for your feedback
Sorry! We couldn't be helpful
Thank you for your feedback
Feedback sent
We appreciate your effort and will try to fix the article