Applying or Removing a Stop Sell.
In the System, a Stop Sell can be applied or removed using three different methods:
For Multiple Days (1–14 Days) via Rate & Inventory
1. Navigate to Rates from the main menu.
2. Click on hamburger icon (≡) .
3. Click on Rates & Inventory.
4. Select Stop Sell from the available options.
5. Choose the required Source to which the Stop Sell should be applied.
6. Click on the cross (×) icon to activate the Stop Sell. Once activated, the icon will change to a check mark (×), indicating that the Stop Sell is enabled. A red cross displayed on the calendar indicates dates with an active Stop Sell.
7. A blank cell on the calendar indicates that no Stop Sell is currently applied for that date.
8. Click on Save to update and apply the changes.
To remove a Stop Sell, click the check mark; it will revert to a cross mark.

For Periods Longer Than One Month (Bulk Update)
1. Navigate to Rates from the main menu.
2. Click on hamburger icon (≡).
3. Click on Bulk Update.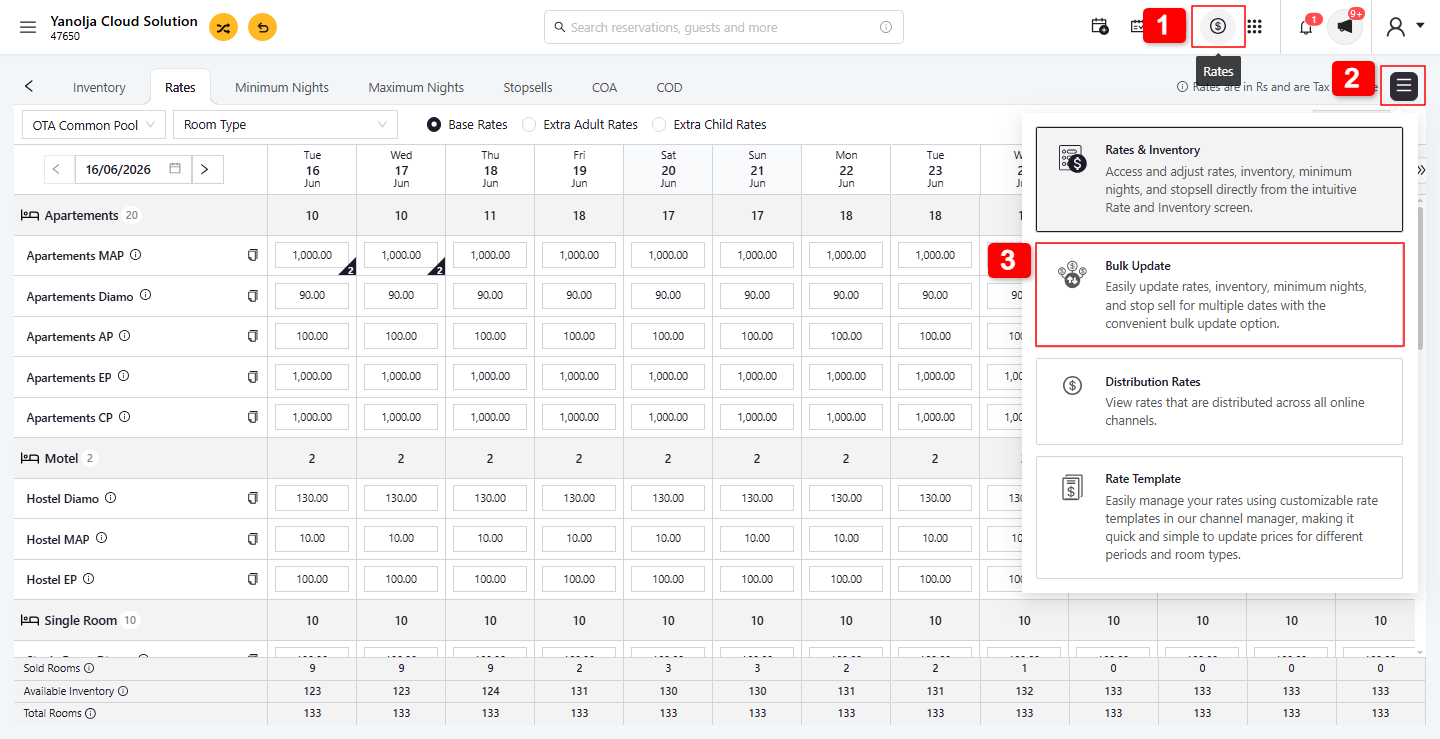
4. Select Stop Sell from the available options.
5. Select the appropriate Source.
6. Select the desired date Range. Click Next to proceed.
7. Click on Next to Proceed. 
8. Choose the Room Type.
9. Click Next to proceed. 
10. You have the ability to update Stop Sell as Everyday or specifically for weekend/weekday as required.
11. Select Every Day to apply the Stop Sell across all selected days.
12. Click Update to apply the changes.

To remove a Stop Sell, follow the same steps.
Was this article helpful?
That’s Great!
Thank you for your feedback
Sorry! We couldn't be helpful
Thank you for your feedback
Feedback sent
We appreciate your effort and will try to fix the article